Download the user manualAdministrator’s guide for corporate version of “Antiplagiat.Basis” system
- Introduction
- Preparation for the start
- Profile
- Customer Care Service
- Adding a website
- Administration
- Company documents management
- Company profile
- Billing
- The report on the text reuse check result
- Full report
- Brief report
- Report with formatting
- Document Structure
- Suspicious document
- Downloading the report
- Direct link to report from "See results" page
- Certificate
- Contact information
Introduction
This manual is intended to familiarize you with the means of work in the "Antiplagiat" .
The manual contains information about the purpose, capabilities, features of the system, as well as a description of the actions that provide check of text documents for the detecting reuse.
Terms and definitions
|
Term |
Definition |
|---|---|
|
System "Antiplagiat" (service) |
Online tool for working with text documents with user interface on the web-site. |
|
Text similarity |
A fragment of the document text that contains the text or a fragment of the source text and is not formatted in accordance with quotation rules |
|
Text recycling |
A fragment of the document text that contains the text or a fragment of the source text, the author or co-author of which is the author of the checked document |
|
Quotes |
A fragment of the document text that contains the text or a fragment of the source text and formatted in accordance with the rules of quotation, with full bibliographic information about the source. Also quotes include common expressions, bibliography, fragments of text found in sources from the collections of regulatory documents. |
|
Text similarity percentage |
The proportion of all found similar text in relation to the total size of the checked document in characters |
|
Text recycling percentage |
The proportion of all found text recyclings in relation to the total size of the checked document in characters |
|
Quotes percentage |
The proportion of all found quotes in relation to the total size of the checked document in characters |
|
Originality percentage |
The proportion of all document text fragments that were not found in the sources used for check, in relation to the total size of the checked document in characters |
|
Report |
The result of checking the text for reuse:
|
|
Report share |
The ratio of the volume of matches that is taken into account within this source to the total volume of the document. That is, if the same text was found in several sources, it is taken into account only in one of them. When summing up the shares in the reports for all sources, a percentage of "Similarity" is obtained. |
|
Text share |
The ratio of the volume of matches of the source text to the volume of the document. The shares in the text by sources are not summed up when calculating the total percentage of matches. |
|
Report blocks |
The number of text similarity blocks from the source, taking into account the intersections of all found sources. |
|
Text blocks |
The number of text similarity blocks from a source without regard to other found sources. |
|
Collection (search module) |
The software module of the corporate version of the system "Antiplagiat", implementing the search for text reuse. The module uses a search index or a special computational algorithm to build reports. The system can have several collection. Search modules may differ in purpose, for example:
Once you have access to several search collections, you can build both individual reports and a single report for all search collections. Some collections perform searches across specialized databases with the casts of the texts of the source documents, but to obtain access to the selected search module doesn't mean getting access to the full texts of the documents it can find this collection. In the received reports, links to the documents will be indicated (their names will also be given), and when viewing the source text, it will contain fragments that coincide with the document being checked. |
|
Browser |
Software that allows users to view pages on Internet sites and access files and software associated with those pages. For example, Mozilla Firefox, Google Chrome, etc. |
|
Text metrics |
Semantic characteristics for each uploaded document. |
Purpose and conditions of use
The service is designed to check text documents for plagiarism. As a result of the scan, users receive text reuse reports. The report contains information on the sources and indicators of text similar to source, as well as detailed information with the indication of those fragments of the checked document that have been identified as text similarity. The identification is accompanied by the presentation of the matching text fragment of the borrowing source and/or the reference to the original (URL). As a result of the document check, the user can determine which part of the document is written independently and which part is reused.
To use the service you need:
- Connect to the Internet;
- Install a browser or use the browser of one of the most common types built into your operating system (MS Edge version 97 and above, Mozilla Firefox version 90 and above, Opera version 78 and above, Chrome version 92 and above).
The results of work with the system "Antiplagiat" are not the basis for claims of copyright violations, the service is aimed at use only for information purposes. In other words, we do not declare that a particular text is plagiarism, but only inform you about the presence of the same or similar text fragment. It is possible that when working with the service, you will find the text copied from other sources, including the possibility that the downloaded document is the original source. In any case, when working with the service, be careful, try to be objective and do not rush to conclusions. Remember that the service is only a tool of work, and only the user can give a real assessment to the document.
Preparation for the start
Workplace
To prepare the workplace when working with the system "Antiplagiat" it is enough to open a browser. To work with the service, browsers of the most common types, such as MS Edge version 97 and above, Mozilla Firefox version 90 and above, Opera version 78 and above, Chrome version 92 and above, can be used.
To get started, go to the service website by typing in the address bar of the browser address you received by e-mail from the administrator of the company.
So, we have a ready workplace:
- files downloaded to your computer;
- the browser is open;
- the service's website page is opened in the browser.
Log in and log out from the system
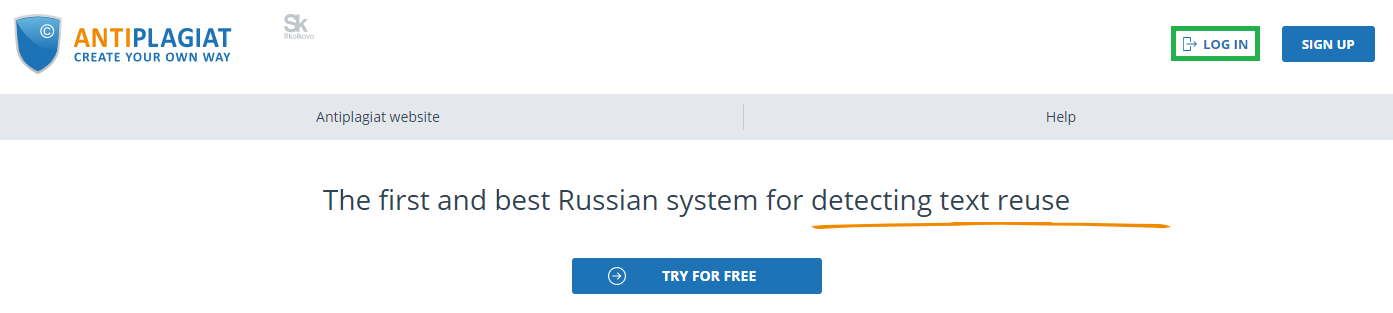
To access the system, use the login form. To do this, click on the "Log in" link in the upper right corner of the page.
If you do not remember the e-mail that you used for registration in the system, then you can use the "Remember e-mail" function on the login page. You will see a window for entering registration details from the old site: login and password. If you enter your login and password correctly, you will see the e-mail you used for registration on the old site.
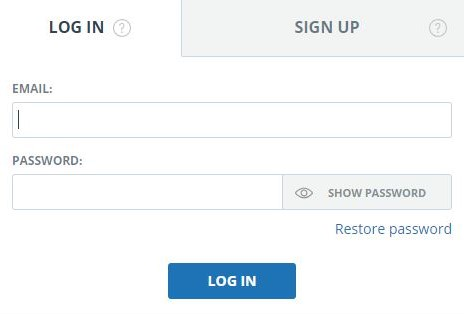
Fill your credentials into the opened login form. Click on the "Show password" button, if you want to check the correctness of the password. Click on the "Log in".
After log in the icon "Menu" will be displayed on every page of the website in the upper right corner of the page. When you click on the icon, the navigation through the sections of your account will be available. To the left of the "Menu" icon you will see a brief information about yourself: the role in the system and e-mail. Figure 4 depicts an example for the "Expert" role.
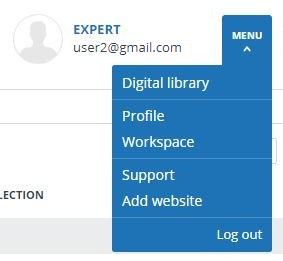
To log out from the system, click on the "Menu" icon and then select "Log out".
Role change
If your system administrator has assigned you more than one role, you will see an arrow next to the role name located at the top of the page. Click the name of the current role to view the full list of roles available to you.
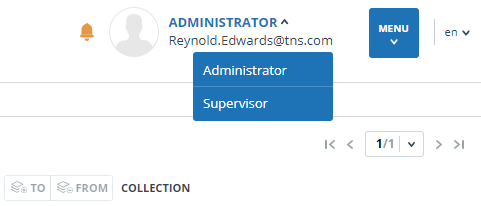
To change a role, click its name in the drop-down list of roles. After that, the page will change the name of the current role, and you will be redirected to the user account for this role. Please note that only one role is available at a time.
Profile
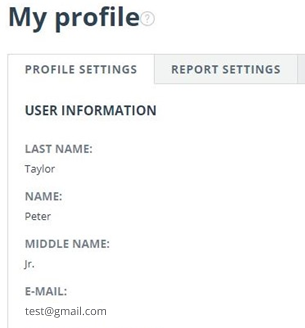
To go to your profile, click on the "Menu" and select the "Profile" tab.
In the profile you can review your credentials. User's data can be changed only by the company administrator.
Two-factor authentication
Two-factor authentication (2FA) is an additional security measure for an administrator's account. 2FA is implemented by linking your account to a 2FA application, which must be installed on a mobile device (smartphone or tablet).
You can install any 2FA application, but we recommend using Google.Authentificator (iOS, Android).
Applications generate one-time digital codes that will need to be entered before performing the following actions with users:
- User creation (after clicking the "Add" button on the user creation page);
- Batch creation of users (after clicking the "Import" button on the administration page);
- Changing a user (after clicking the "Change" button on the page for changing a user);
- Sending a password to the user (after clicking "Send passwords" in the action confirmation window);
- Unblocking the user (after pressing the "Unblock" button in the action confirmation window);
- User recovery (after pressing the "Restore" button in the action confirmation window);
- Impersonating into a user (after clicking the "Log in" button on the "Administration" page).
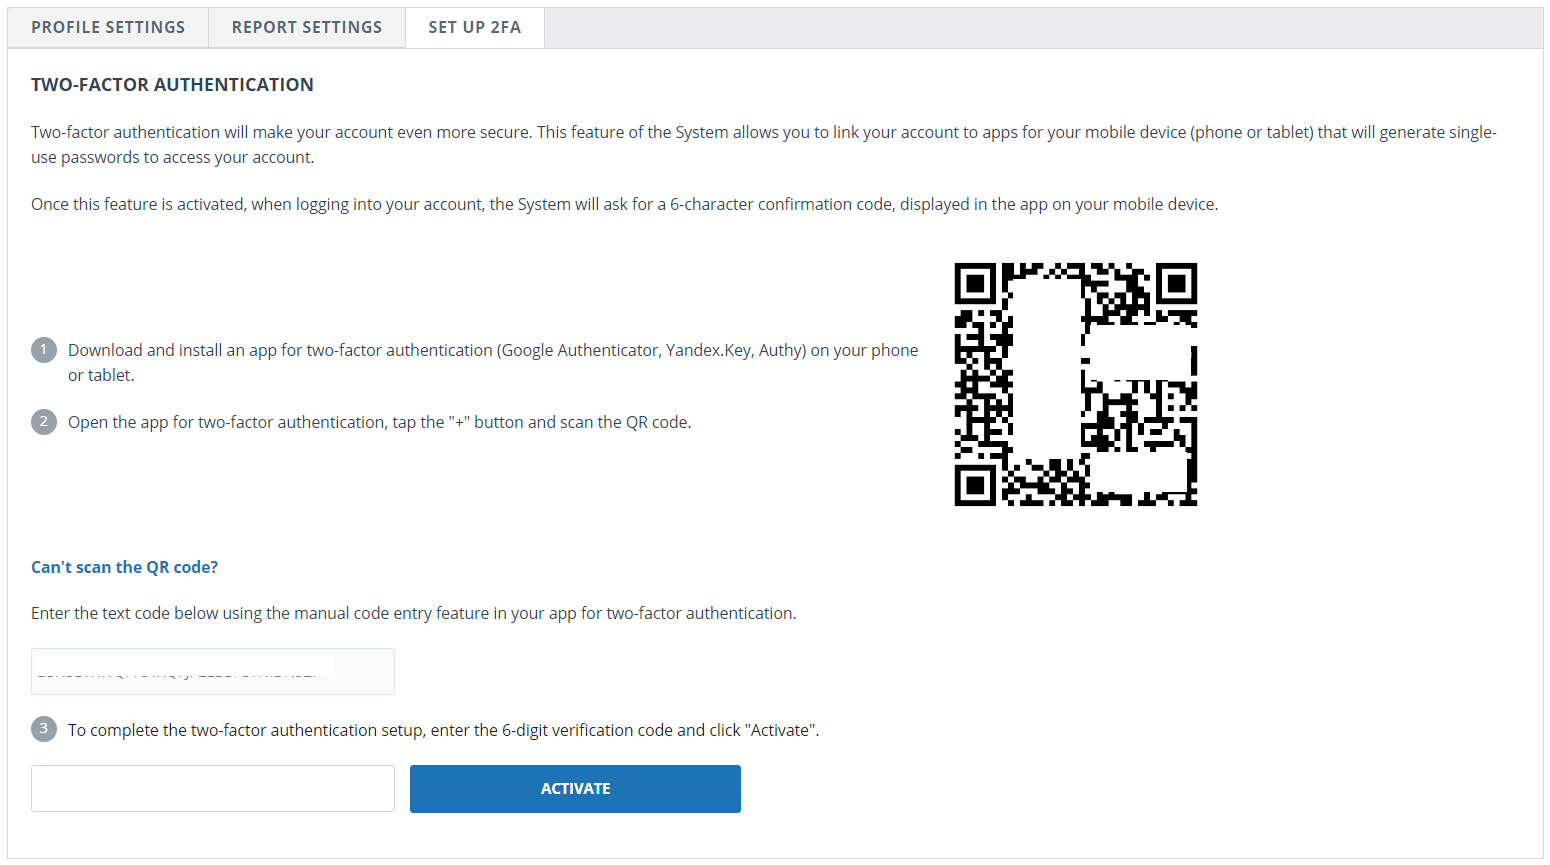
In order to set up 2FA, follow these steps:
- Install the 2FA application on your mobile device (smartphone or tablet);
- Scan the QR code using the application, or enter the text version of the code;
- After the application generates a numeric code, enter it in the field at the bottom of the page and click the "Activate" button;
- Click the "Close" button in the window that appears with a message about the successful connection of 2FA.
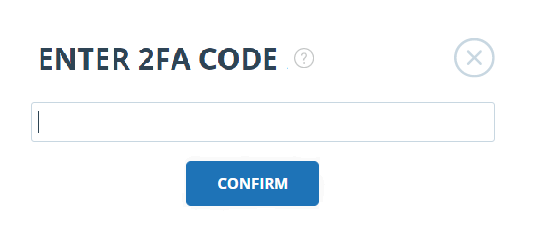
A window for entering 2FA will appear when performing actions with users. You will need to enter the numeric code from the application and click the "Confirm" button.
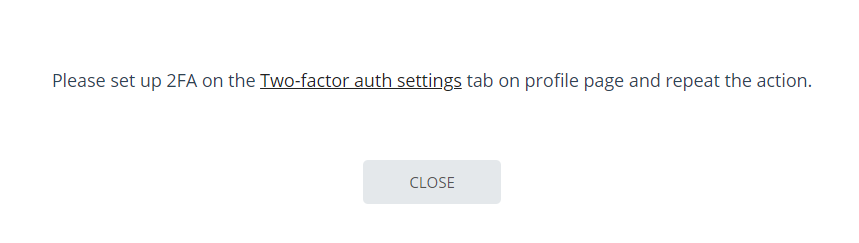
If you have not previously linked your account to the 2FA application, then a window will appear with a message about the need to configure 2FA when you perform an action with the user. The message will contain a link to the "2FA Settings" tab.
The 2FA functionality is enabled by default. 2FA is activated for free.
Important! If the administrator loses access to the 2FA application on a mobile device, then the 2FA settings can be reset by "Antiplagiat".
employees.
To reset 2FA, contact your organization's root system administrator. If you are a root administrator and you need to reset the 2FA administrator, then write an email to our Customer Care Service support@antiplagiat.ru.
Customer Care Service
If you do not find answers to questions about the system, please contact Customer Care Service. To do this, click on the "Menu" in the upper right corner and select the "Customer Care Service" tab. The system opens a window with a form to send the case.

Enter your question in the "Message" field and click on the "Send" button. Our experts will respond to your request to the e-mail, which was used to log in.
Adding a website
Our Internet search module performs a check on the already indexed sites of the web. If you find an interesting site or resource that is not included in the Internet search module, you can add it to our search module. This will allow you to build more complete and reliable reports for check through the Internet search module.
To add a website for indexing, click on "Menu" and select "Add website". Copy the link in the URL field and click "Add". You can also leave a comment about the site to which this link leads, for example, that this site is an open e-library or abstracts site.

If the site you specify is already known to our system, you will receive the message: "The Site has already been processed by our system".
Please note that the new website will be placed in the Internet search Module according to the order of the indexing queue.
Administration
View the list of users
To view the list of users, click on "Menu" icon and select "Administration" section.
The list of company users appears with the information about them.

First time you log in, you will see two users with Administrator role (learn more about roles in the "User roles" section):
-
Support Service – an employee of
"Antiplagiat"
company, who is responsible for supervision over system efficiency, troubleshooting and assistance to users of the company.
- Root administrator - administrator of your company, created by "Antiplagiat" Customer Care Service during company activation.
User roles
The system "Antiplagiat" provides the following user roles:
- Administrator - user of system, who is responsible for administration of usage of the purchased product.
- Expert - user of system, who checks text documents.
- Supervisor - user of system, who can view all actions of all users of purchased system.
Availability of these roles depends on your system configuration.
User search
For convenience of usage of the list of users, the system provides search for users by id, e-mail, name, registration date, login date, role and status.

By default, list of users is sorted by registration date in descending order. You can change sorting order in the header of the table, the direction of the arrow will change, pointing to the sorting method, and the column, which is currently sorted, is highlighted in bold.
Impersonation of administrator into user's workspace
You can impersonate into account of any company's user. To do this, click on "Log in" button in row with the selected user. Page with user's workspace under his/her login will open in the new tab. Administrator can access all features and documents of this user.
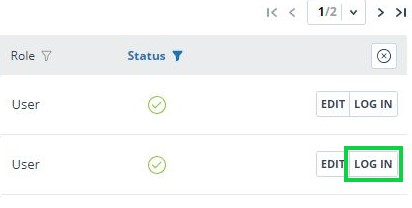
You can impersonate in only one user. To exit the impersonation mode, click on "Log out" in the user menu. After that, the administration page will open, you can continue to work with the system on your own.
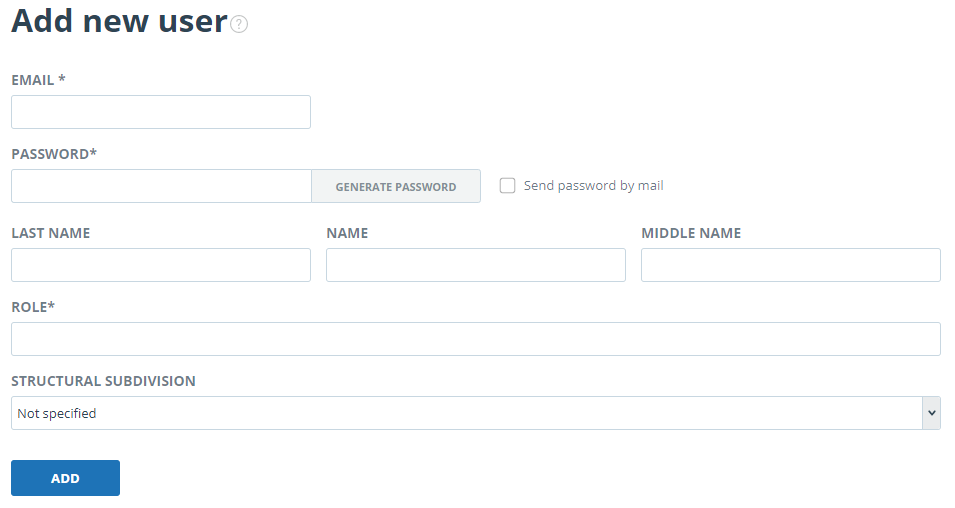
Creation of a new user
To add a user of the system, click on the "Add user" button in the top menu. Fill in the fields of the opened form and click "Add". The new user will be displayed in the top row of the table.
E-mail, password and role are the required fields.
Multiple roles can be assigned to a user in the system. Depending on the roles assigned, the user can switch between them and perform the activities that are specific to the role.
The created user will receive a link sent to the specified e-mail for setting the individual password. If you uncheck the "Send password by e-mail" checkbox, then the link for password setting after clicking the "Add" button will not be sent. To postpone or resend the link to the password setting page, use the Editing Users section.
Editing users
To change the information about a user, click on the "Edit" button in the row of the appropriate user. The edit user's account window will open.
The Administrator can change the e-mail, user information, oblige the user to change the password (send a link to the password setting page), change or add another role to the user in the system.

To send a password setting link to the user's e-mail, flag the box "Send password to e-mail" in the edit tab of the user’s account and click on the button "Save changes".
Please note that after sending a link to the user for setting a new password, the login using the user's current password is blocked. The user must independently set a new password to continue working in the system.
You can send links to the password setting page to multiple users at the same time. To do this, flag those users in the list who need to set a new password (if necessary, select all users) at once), and in the top menu click on the button "Send password by e-mail".
After confirmation, an informational message will appear about the successful sending of letters with links to the users’ e-mails with an indication of their number.
Please note that passwords for some system users cannot be changed (root administrator, system support service).
Blocking and deleting users
You can use the menu above the list of company's users to block and delete the user's account. On the same form, you can restore and unblock the user.
To block/delete several users at the same time, you need to mark appropriate users and click on the "Block" button or "Delete" button.
To block / delete all users on the current page, flag the ID box and click on the "Block" button or the "Delete" button.
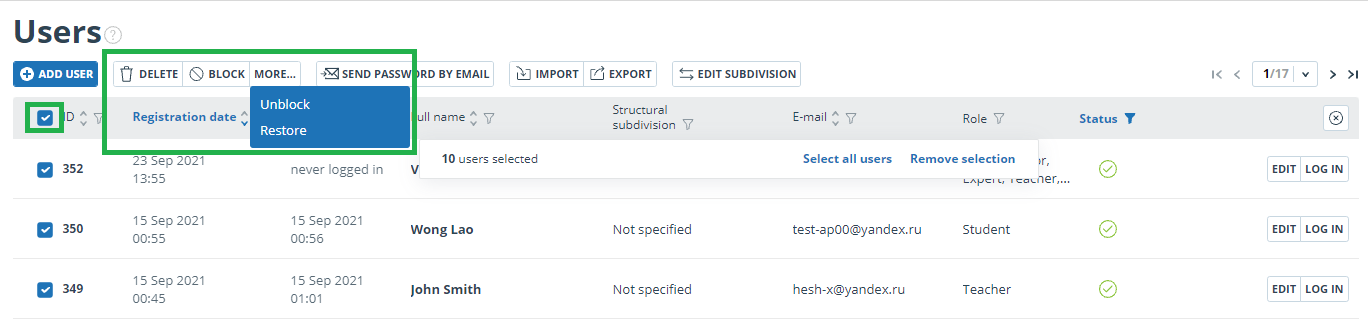
To block / delete all users, click on "Select all users", and then on the "Block" button or on the "Delete" button.
To deselect users, click on "Deselect". In this case, all users will be deselected.
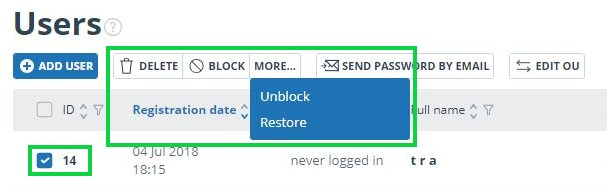
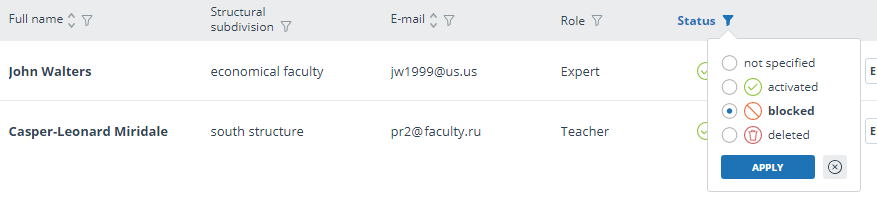
By default, the user list displays only activated users. To see deleted or blocked users, click the filter icon next to the "Status" column, select the status "blocked" or "deleted" and then click "Apply".
Mark appropriate users, click on the "More" button and select the "Unblock" or "Restore" action.
Company documents management
The administrator of the company can view all the documents of the company. To do this, click on the "Menu" and select the "Collection" section. A list of company documents opens, displaying documents uploaded by all users of the company.
Company documents revision
On the left side of the "Folders" panel you will see the sections where all uploaded company documents are stored.
The "Storage" section is available and is displayed only if you have your own collection maintenance connected.
Please note that "Company documents", "Storage" and "User documents" are system folders. You cannot delete, move, or rename system folders. You can add, delete, and rename documents and folders only in the “Storage” folder.
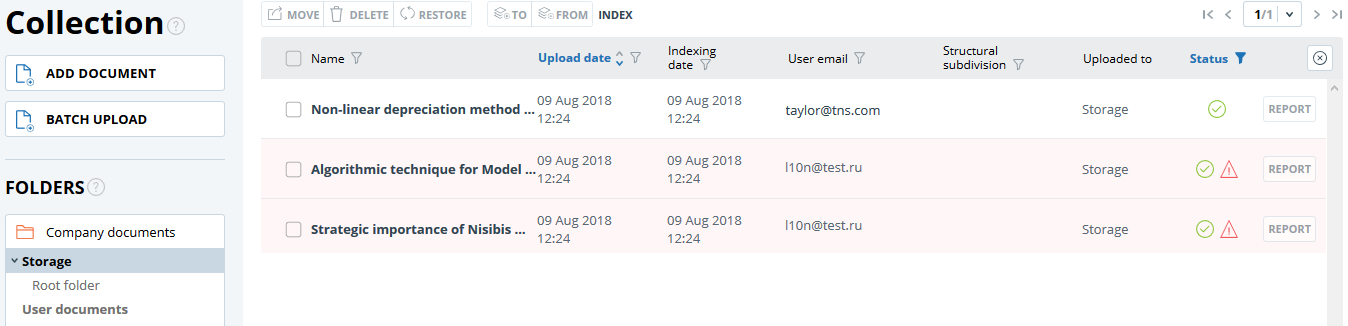
The section "Company documents" contains a list of all company documents uploaded by users and administrators, both in their personal accounts and in the storage. Additional information, including author, upload time, and status, is displayed for the documents.
Sorting, filtering and searching by table columns is similar to the "Administration" section.
"Storage" is the company's own collection, which used to check the documents of the company's users. The structure of this section is similar to the section "Company documents". There are two types of placing in index for the documents in the "Storage" - in index of approved and in index of text similarity. Duplications, which was founded via documents from index of approved, relate to citing percentage. If the document is placed in index of text similarity in the "Storage", then duplications relates to text similarity percentage in text reuse reports.
Section "User documents" contains documents uploaded by users of the company to their offices. The structure of this section is the same as in the section "Company documents".
Adding and deleting the documents from the index
If you want to search for reuse in the system "Antiplagiat" carried out on the documents uploaded by your organization, add the document to the indexation. Check the documents box and select the appropriate action from the top menu. Similarly, the process of extracting from the index.

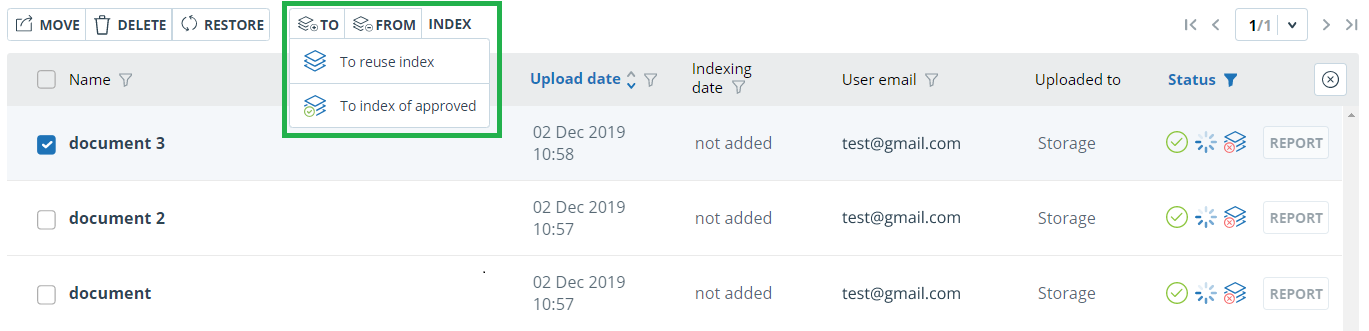
User documents are placed in the similarity index. Only documents from the company's storage may be in the index of approved. To place documents in the index of approved, open the "Storage" section, tick the documents with checkmarks and click on the "To Index" button in the top menu. In the drop-down menu, select the "To approved index" button.
Deletion and restoring of company documents
To delete documents, check the documents checkbox and click the Delete button in the top menu.

To restore previously deleted documents, click the filter icon next to the status column name, select the deleted status, and then click Apply. Now check the box documents and click on the "Restore" button in the top menu. Once recovered, the documents will appear in the root folder of the users who previously downloaded them.
Adding the document to the "Storage"
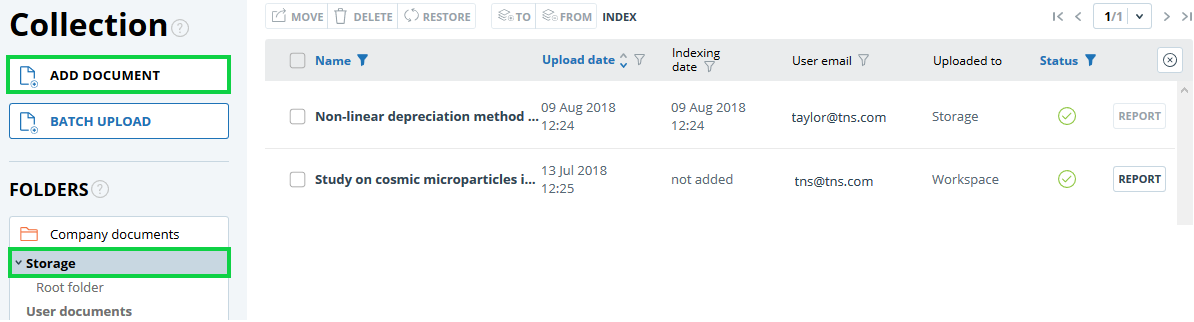
If you have a set of documents and you want to check users' documents by them, you need to add these documents to the "Storage". To do this, select the appropriate folder in the "Storage" and click "Add document".
Documents are added to the "Storage" without checking and reporting. Documents uploaded to the Vault are added to the index of their own collection as soon as they are loaded, but they can be removed from the index once they are loaded.
In Storage, you can create, delete, rename, and move subfolders.
For placing documents in index of approved at the moment of uploading in "Storage", click on "Approved for citing" button on uploading to "Storage" form.
Company profile
The company administrator can view the company profile. To do this, in the upper right corner click on the "Menu" icon and go to the "Company profile" tab. The company profile consists of the following tabs: "Account data", "Notification settings", "Contacts", "Statistics" and "Billing".
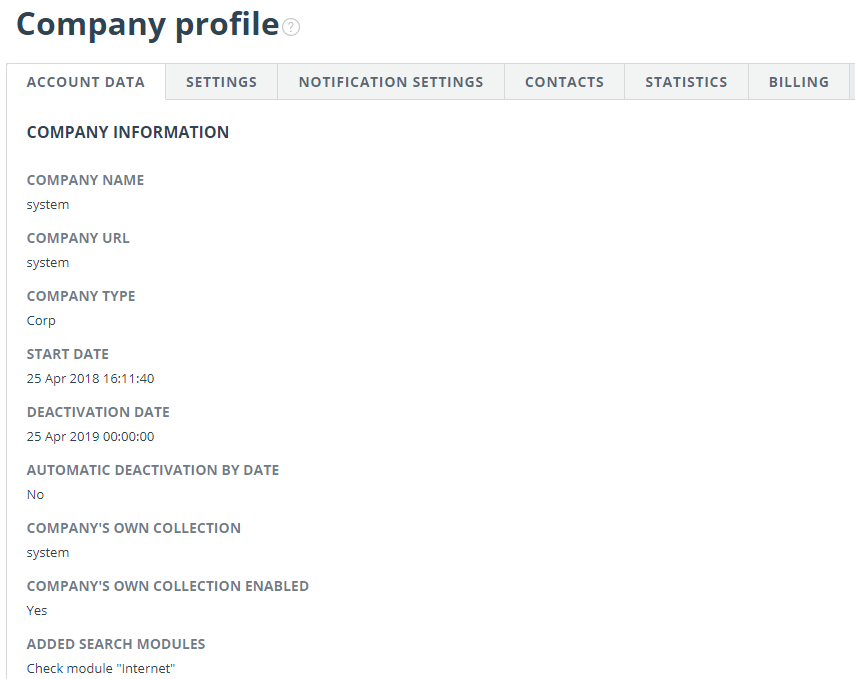
Review of account data
"Account data" tab displays information about company, information about available search modules and about company’s own collection, dates of activation and deactivation and e-mail of the root administrator of company.
This tab is not editable by company administrator. If you find a mistake or want to change information on this page, contact our Customer Care Service (support@antiplagiat.ru)
Settings
On the "Settings" tab you can choose language of system's interface. Select language in the drop-down menu and click on the "Save" button. If you select "Not specified" option, the system interface will be displayed in Russian language by default.
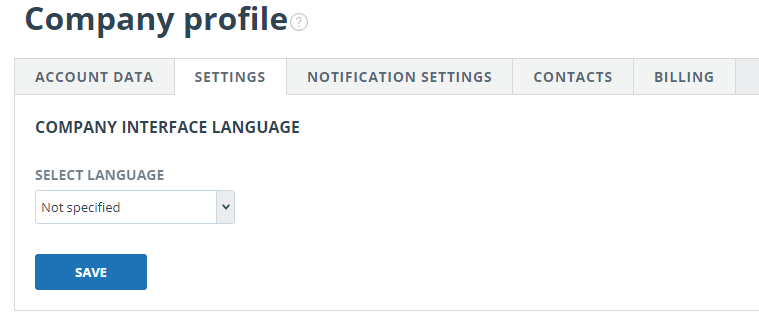
On the "Settings" tab you can opt to prohibit student's self-signup. In this case, students of your organization will not be able to register in the system on their own.

Notification settings
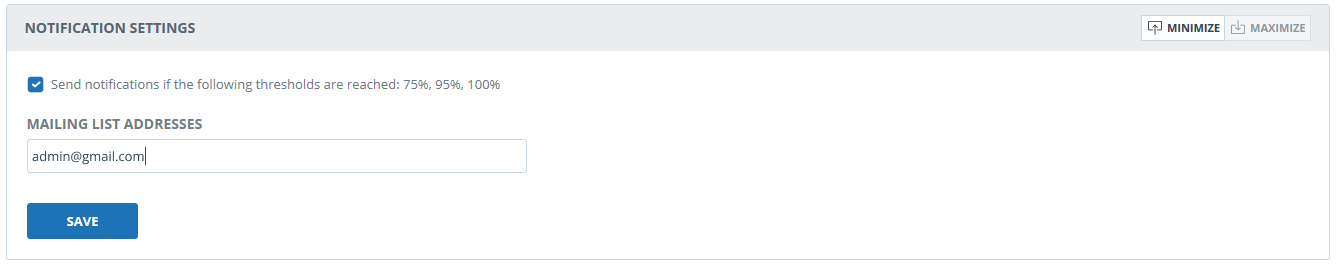
In the "Notification settings" tab you can specify whether to notify when the limits are reached and select the timeframe of notification, and a specific date of notification. The system also has the ability to display a message and a warning about deactivation on the main page of the system.
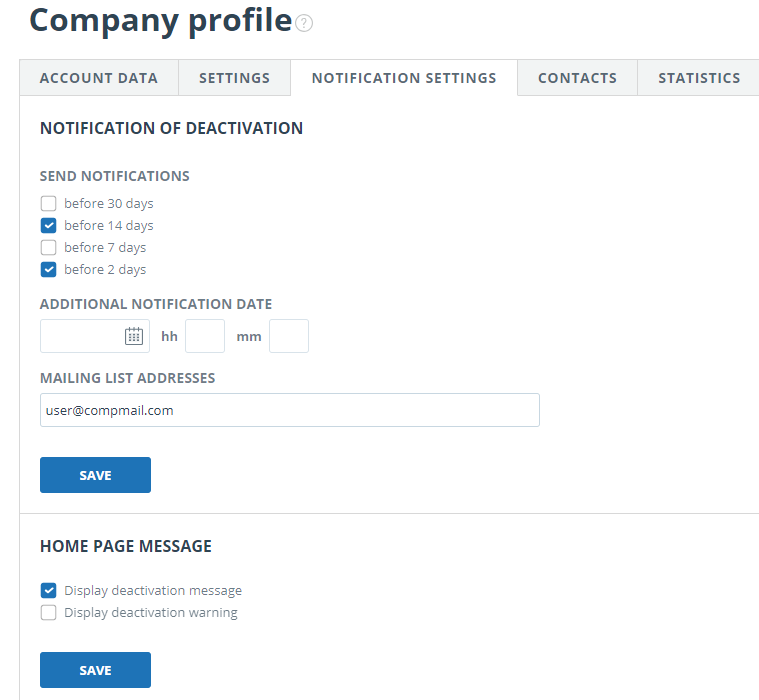
By default, the notification setting is set for 14, 2 days and at the time of shutdown. You can change the default settings, change e-mail for sending notifications, and enter an additional notification date. In the field "Mailing list addresses" you can enter several e-mails, without spaces through the separator ";".
Please note that sending notification at the moment of deactivation is mandatory and cannot be edited.
You can mark or unmark the output of the shutdown message and the company's shutdown warning on the company home page. By default, "Display deactivation message" is selected.
To save your changes, click "Save".
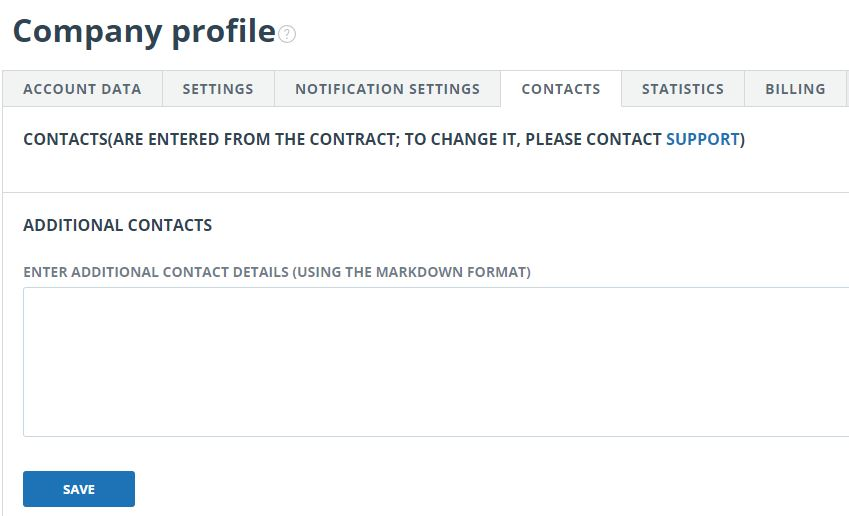
View and edit contact information
The "Contacts" tab displays contact information of the company administrator.
The "Contacts" section is filled with the information specified in the contract. This field is not editable by the administrator. To make changes, please contact our Customer Care Service (support@ "antiplagiat.com" . ).
In the "Additional contacts" section you can enter additional contact information in the edit field. To save your changes, click "Save".
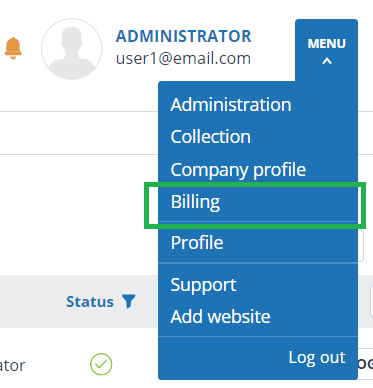
Billing
The limitations of users for checks managment and information about company's rate plans is available for administrators.
Billing page is available by clicking "Menu" icon in the upper right corner of every page on the website.
Purchase of services for the company
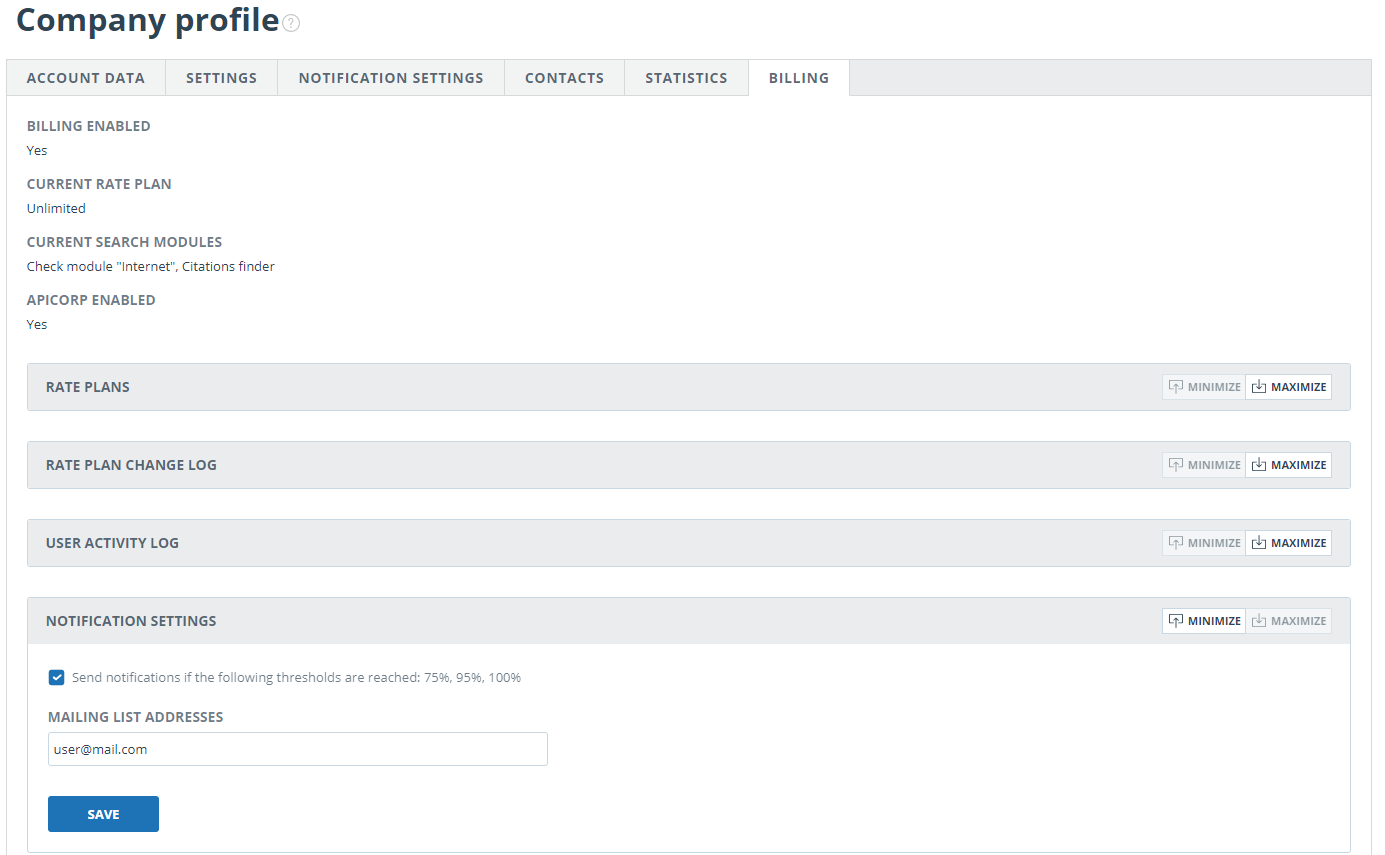
The view of the company’s billing tab is available for administrator.
The page contains the following sections:
- Rate plans;
- Rate plan change log;
- User activity log;
- Notification settings.
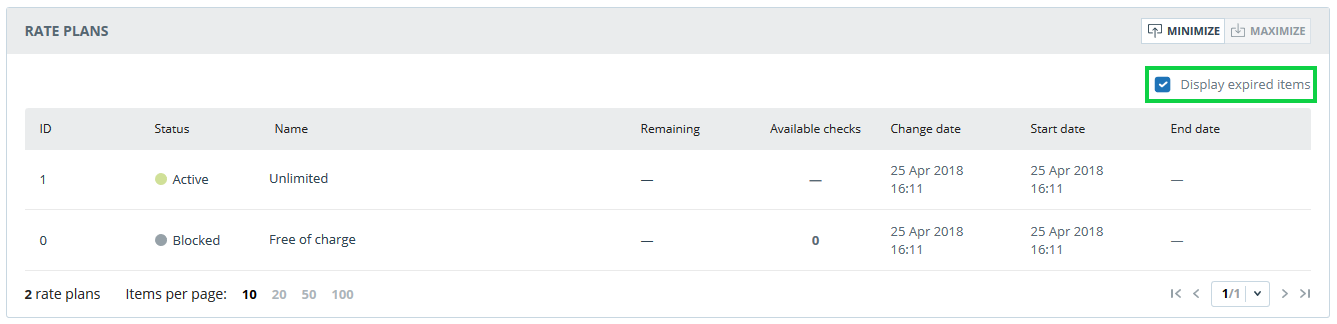
The "Rate plans" section displays information about the activated rate plan of the company, including the validity interval and the number of checks on the rate plan. If necessary, you can view what rate plans have been activated to the company previously. To do this, check "Display expired items".
In the "Rate plan change log" section you can view all the changes that have occurred with the company's rate plans.

The "User activity log" section contains information about the checks made by users of the company.
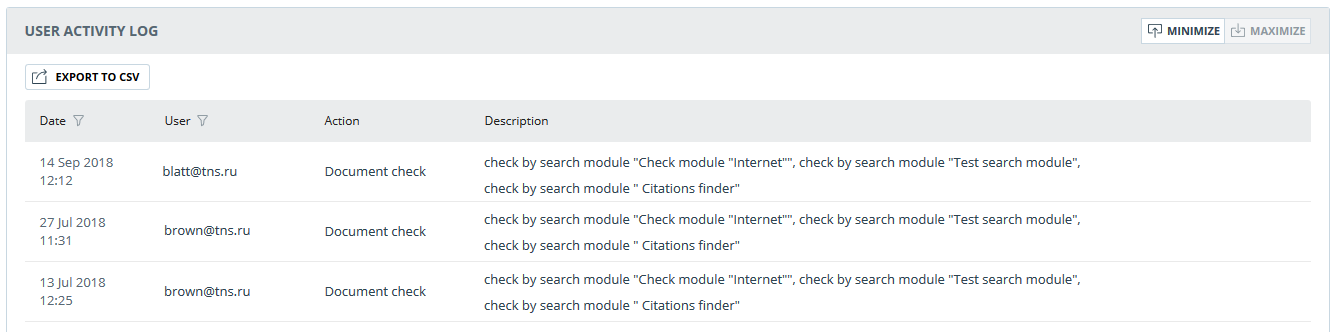
The activity log is available for download only. To receive it, select the time period for which you want to receive information about users, and then click on the "Export activity log" button. The export will start automatically, or a file export and save dialog box will open, depending on your browser settings.
You can search by user's e-mail and see only the actions of a specific user, as well as apply a filter to the date of the action. To do this, in the header of the table click on the column on which the search will be performed, and specify the user's e-mail or the desired period. The system has the ability to export the log in csv-file format.
In the "Notification settings" section, you can specify whether you want to be notified when limits are reached. To do this, check or uncheck "Send notifications...". By default, the e-mail address of the root administrator of the company is specified in the field "Mailing list addresses". You can enter another e-mail to which notifications will be sent. To save your changes, click "Save".
Check quotas
The limitations of users for checks managment is available for administrator. Limitations are set via quotas which show how many checks can be performed by user.
Click on "Menu" icon and select "Billing" to start working with quotas. Here in "Check quotas" tab you can:
- veiw the list of users, quotas assigned to them and remaining checks within quotas;
- set quotas for checks to one or several users;
- set default quotas for checks;
Please note that users without quotas can perform checks until the checks of the company run out.
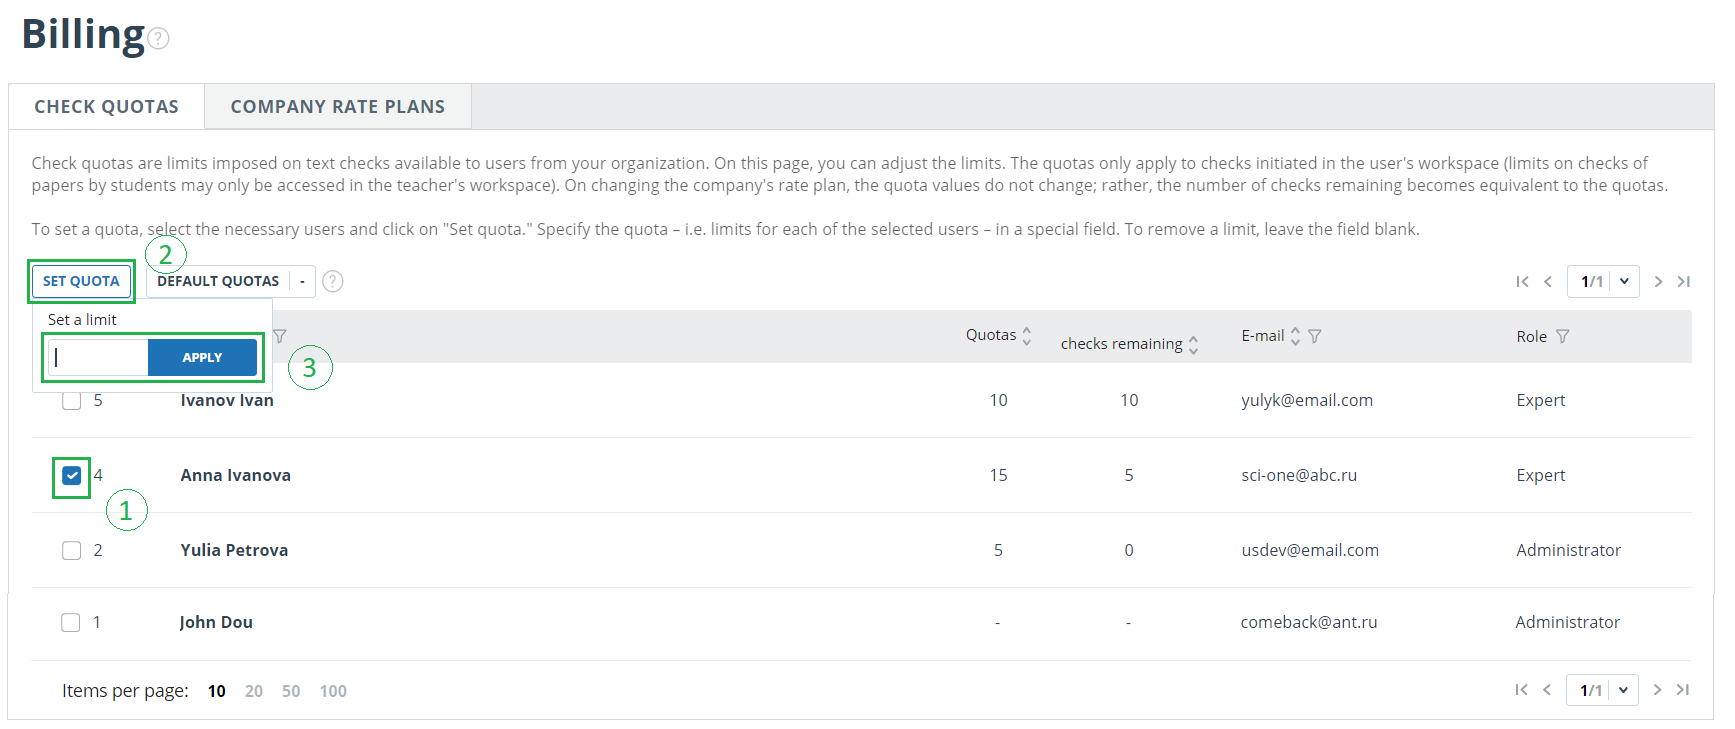
Users list and information about quotas are displayed in "Check quotas" tab. Current limitation of user for checks is specified in "Quotas" column. The rest of the quota is specified in the column "Checks remaining".

Assigning quota to user
For assigning quota to user please perform following actions:
- Select one or several users which are subject to quota, by ticking the mark.
- Click on "Set quota" icon.
- Specify quantity of checks which available for users and click on "Apply" icon.
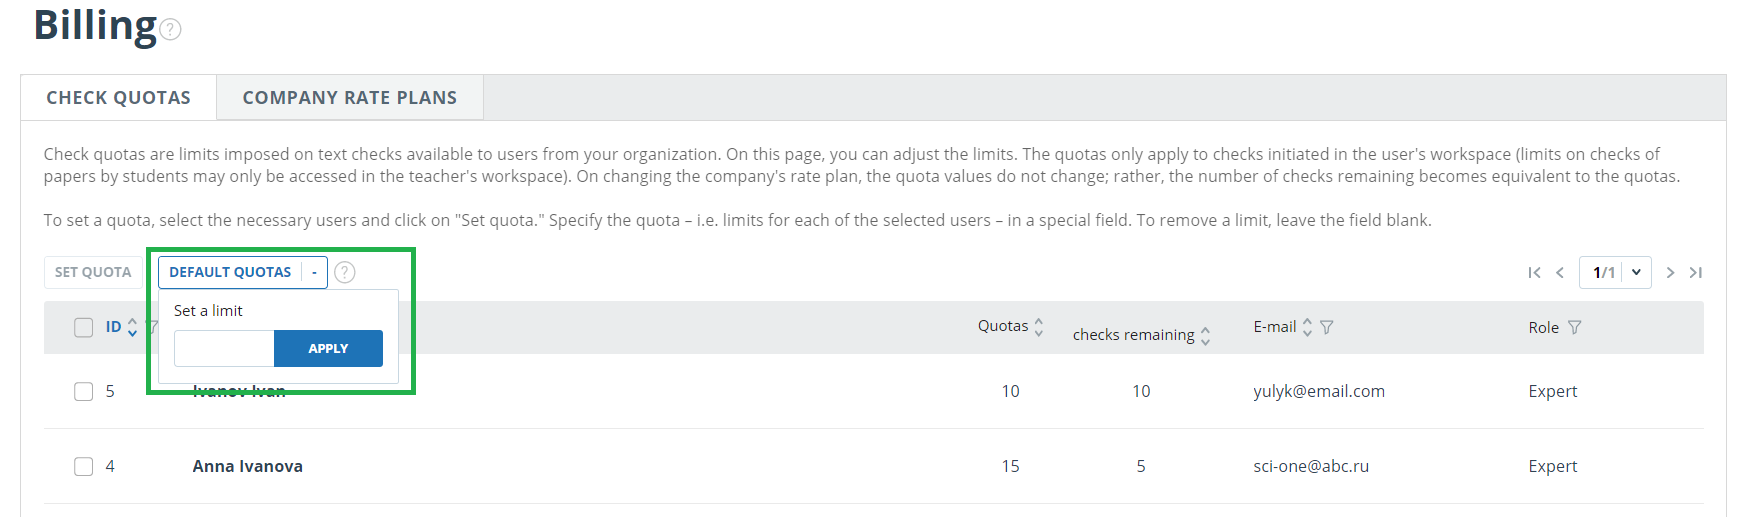
Default quotas
Administrator can set default quota. Value which specified in default quota is used for users without assigned manually quota.
If default quota is absent, then limitation for checks during the creation of new user setting manually.
Please note that when a company is created, the default quota is set to 10 checks. You can independently change this value on the "Billing" page, the "Check quotas" tab.
For setting default quota please perform following actions:
- click on "Default quotas" icon;
- specify quantity of checks which available for users;
- click on "Apply" icon.
The report on the text reuse check result
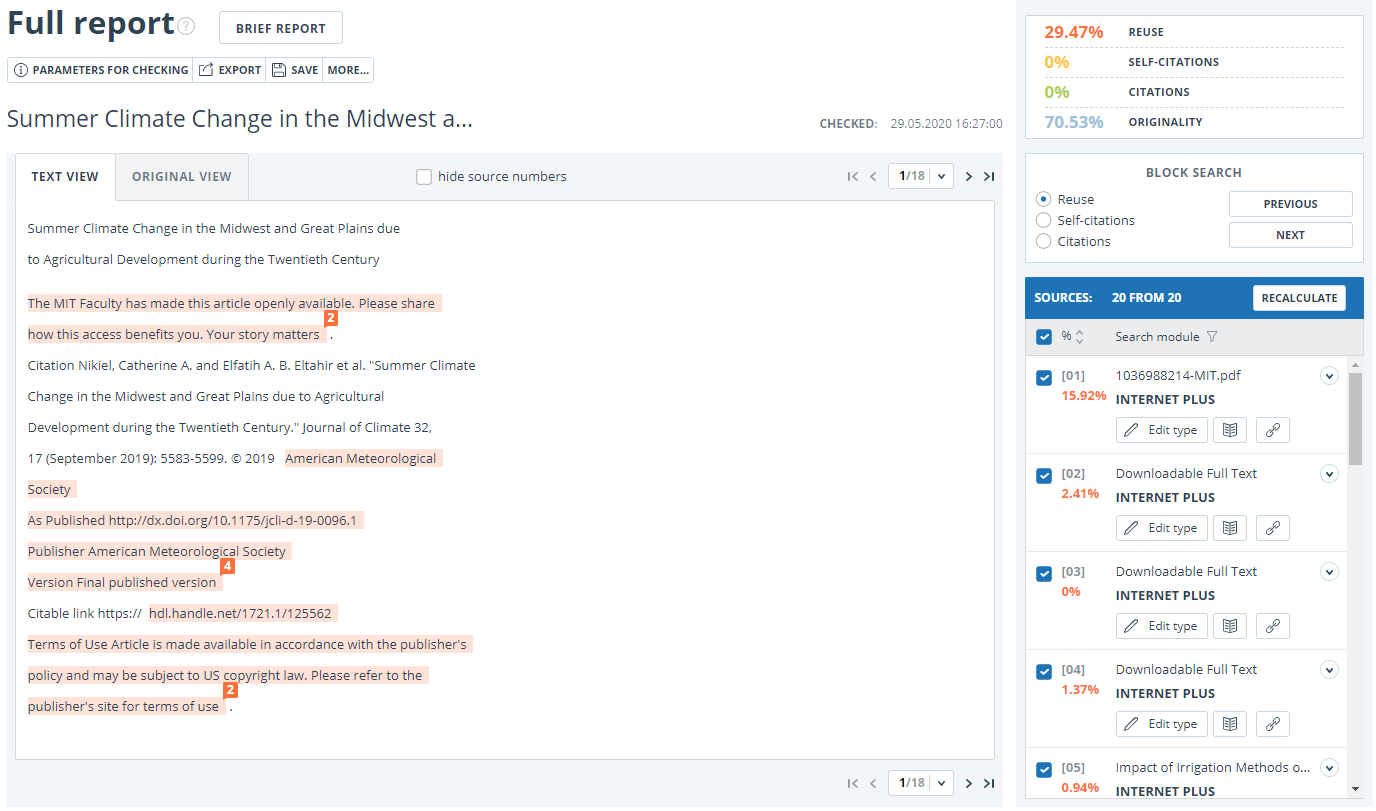
Full report
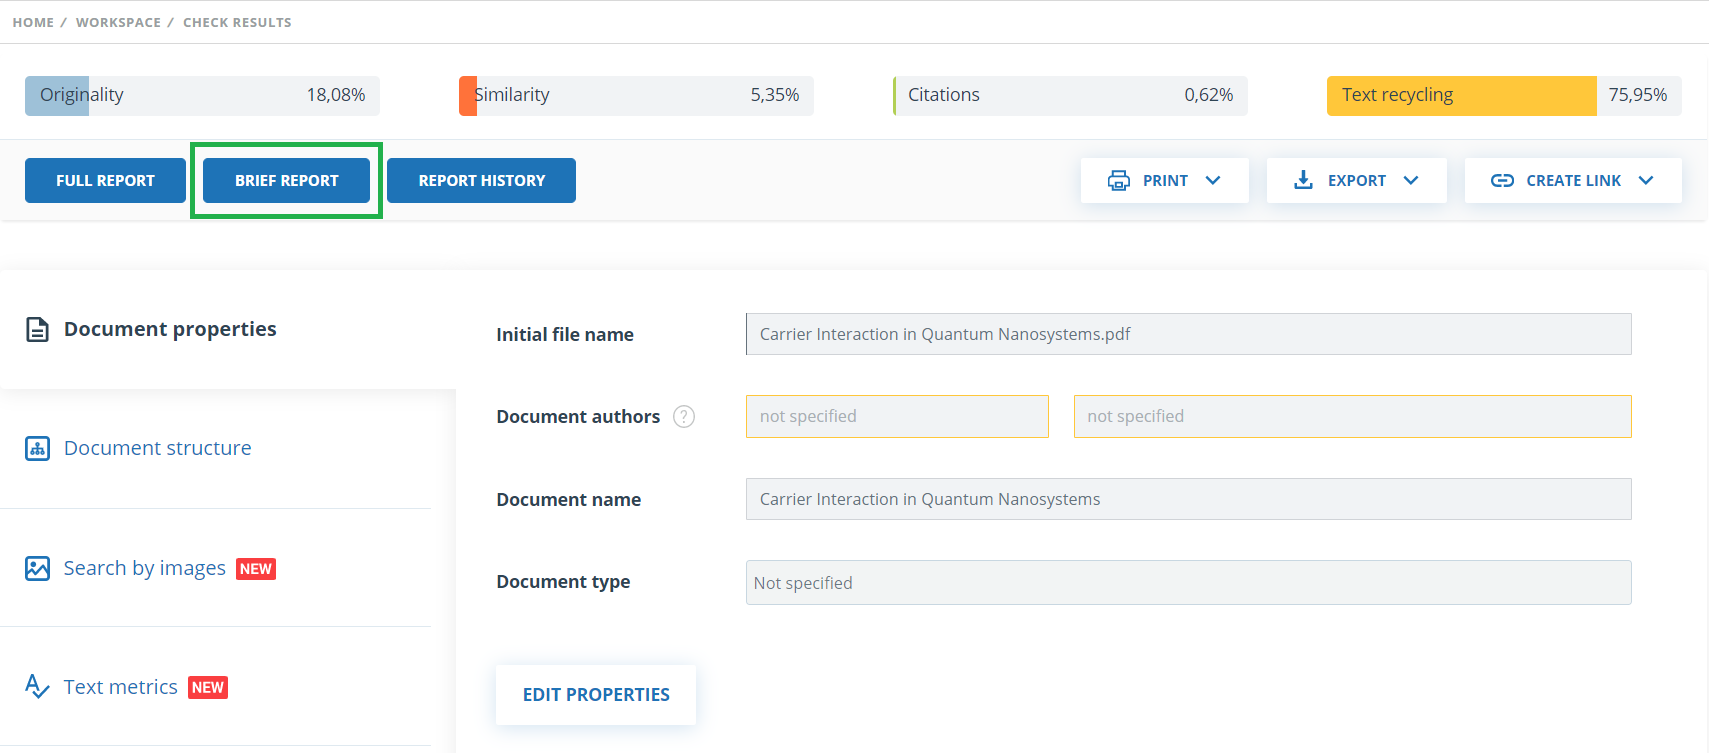
After the document is loaded and checked, you may navigate to the report. To go to the full report view page, click the “See results” button located on the line with the checked document. After this click "Full report" button.
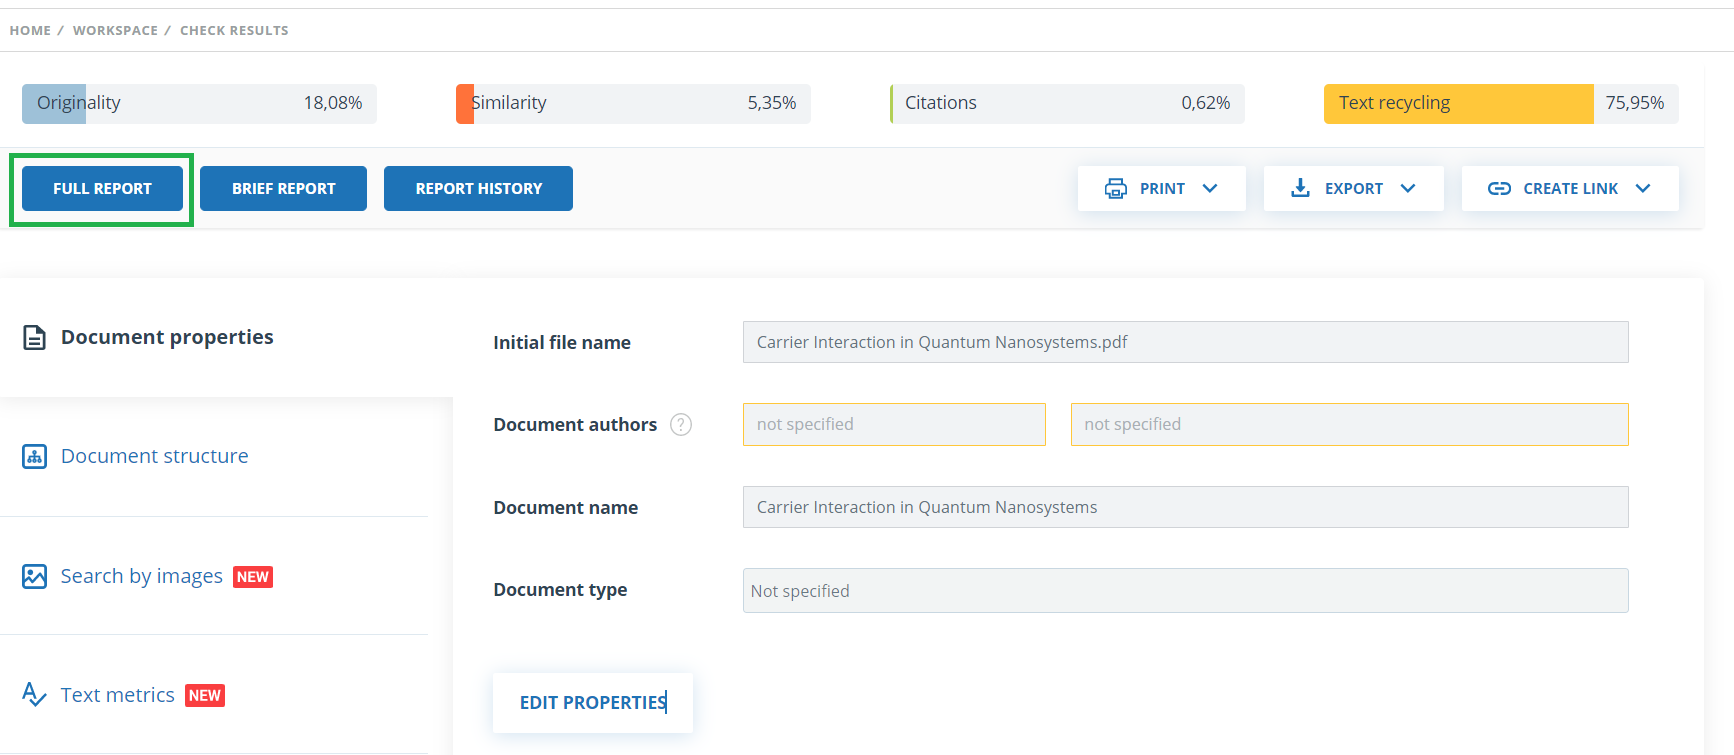
The full report includes:
- evaluation of originality / similarity / quotes / text recycling;
- evaluation of suspiciousness of a document with details on the "Suspicious document" page
- list of similarity sources with the ability to edit and go to the source report;
- continuous or page-by display of the full text of the document marked with the found similar blocks;
- page-by-page display of the full text of the document in the original document;
- the date of document checking;
- document's name;
- report correction.
The figure below shows a General view of the full report.
In the top panel of the page you will see the icon buttons, allowing you to proceed to the next action:
- parameters for checking;
- export of the report;
- downloading the Certificate;
- save the edited report;
- report printing layout;
- view reports history;
- view text metrics;
- get a direct link to the report;
- link to the brief report;
- link to user manual.
Viewing the report
The report page consists of the text to be checked, in which the similar blocks are highlighted, the list of sources, the aggregated results of the check and navigation through the blocks of similarity (search by blocks).
To navigate through the text pages, use the paging panel located above and below the text box. To display all pages of the document at once, click on "Show all pages" at the bottom of the document page.
To return to the page-by-page display of the report text, click the "Show by page" button on the paging panel.
To see which text fragments were similar and to which specific source, all text similar blocks in the system are highlighted, and at the end of each block there is a label with the respective number of the source.
When viewing similar blocks in a report, you can use block navigation (block search). With its help you can go to the next or previous block by pressing the "Previous" or "Next". You can also choose which type of text blocks to use.
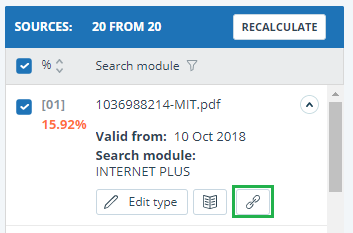
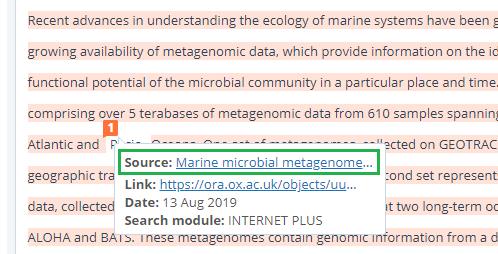
Viewing information about the source
To view information about the source, find the source in the list, expand the respective source and click on the icon.

The source information window displays various data on the source: a link to the source, the date of its publication, the author, etc. The list of fields may be different depending on the search module and the source itself. An annotation to the source is also displayed in the source information menu. Annotation is an automatically generated short piece of text from a document to form an idea of its content.

If the source is placed in index of approved by administrator of your company, then appropriate flag about the source appears. Text reuses from such source included in citing percentage and highlighted by green color.
Parameters such as text share, report blocks, text blocks are customizable. To do this, click on the "Menu", select the "Profile" section and go to the "Report settings" tab. You can choose which of the parameters will not be displayed in the report by unchecking one of them.

When analyzing sources, you can use both report share and text share. For a clear understanding of the difference between them, let's give an example: The report indicates two sources "Source A" and "Source B". According to the sources, the same paragraph of the text was found, which makes up 10% of the total volume of the document being checked. In this case, we will get the following data:
- Source A: text share is 10%, report share is 10%;
- Source B: text share is 10%, report share is 0% (because this text has already been taken into account from source A.)
Another way to view information about a source is to click on the source number in the full report text. A window will appear that contains basic information about the source.

External link to the source
For most sources in the list there is an external link to the location of the document or source text on the Internet. To go to the web page, click the icon next to the source name.
After clicking on the link, the web page on which the text of the block was found will be opened.
A situation may arise when the source is unavailable after clicking on the link. Perhaps the site administrators deleted the text, or the page "moved." But in any case, this text was available at the specified address when the site was added to the index of the search module of the system.
The fact that one or more of the report's links to the open sources on the Internet at the time of viewing the report do not work is not a reason to remove these links from the system's index. Texts at the links' addresses were indexed, before being deleted / moved, they were available to third parties, could be read, copied or otherwise used. Also, they could be stored in the cache of search engines and web archives, where they could still be found.
Viewing the source report
To view the source report, click the link in the source name in the list of sources. A new tab in the browser will open with the text of the source with which there was a duplication. Instead of text that doesn't overlap with the source, you'll see the number of characters that were skipped.
If you want to view the full source text, open the source link by clicking on the "Go to the source website" button.
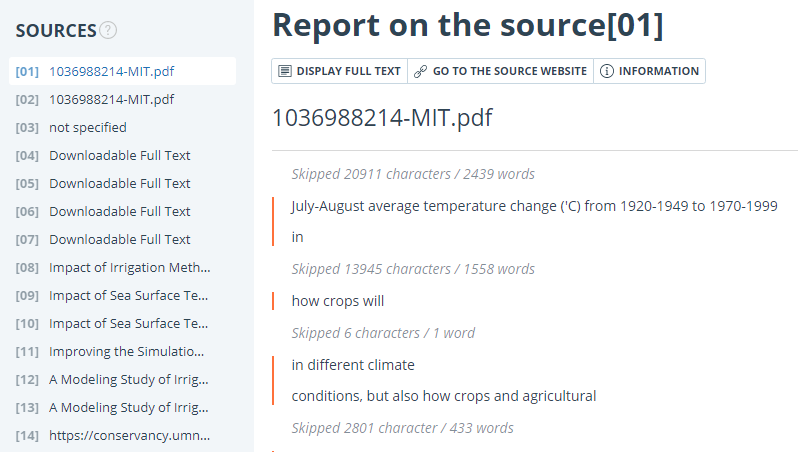
Click another source in the Sources pane on the left to view the report for that source immediately.
You can choose to view the report by source – page or solid text. By default, the source report is displayed page by page. To switch the view mode, click on "Show full text". When you switch to solid text view, the button changes to Show text page by page. Click it to go to page view.
Another way to view the source report is to go to the source report from the block in the text. Click on the source number at the end of the block, then click on the source name.
The page "Report on the source" will be opened with the selected block.
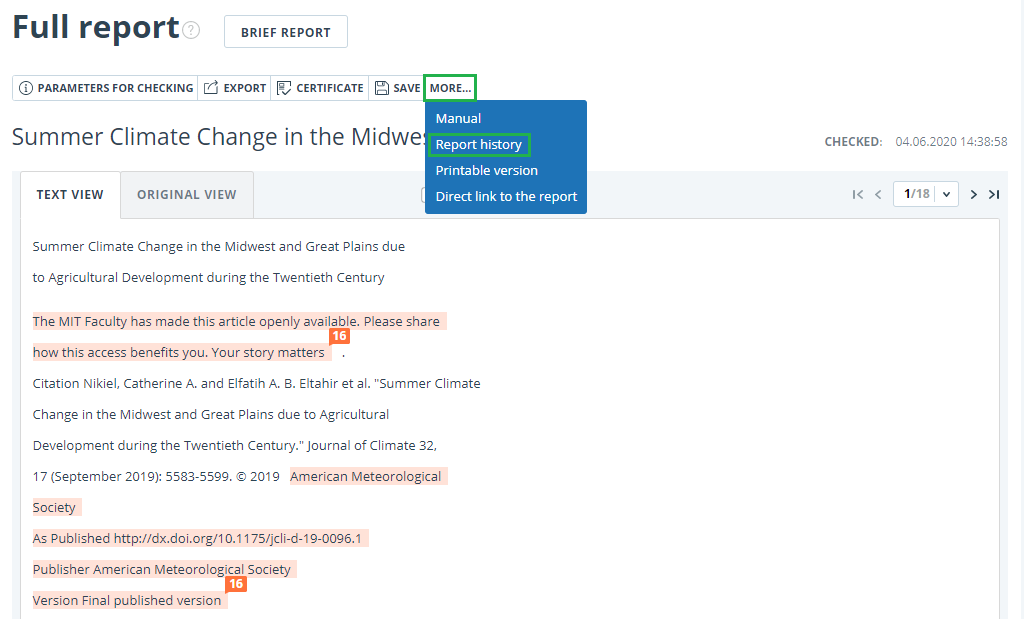
Viewing report history
When you recheck the document or edit the report, all previous versions of the reports are saved in the system. To view the report history, click the "More" button and select the "Report history" item in the top menu of the full report.
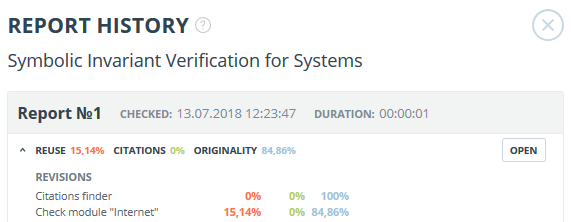
A separate window will open, where you will see a summary of all the reports made for this document. Reports in history are sorted in descending order by the build date.
To go to the detailed view or correction of one of the reports, click the "Open" button. The report opens on a new page.
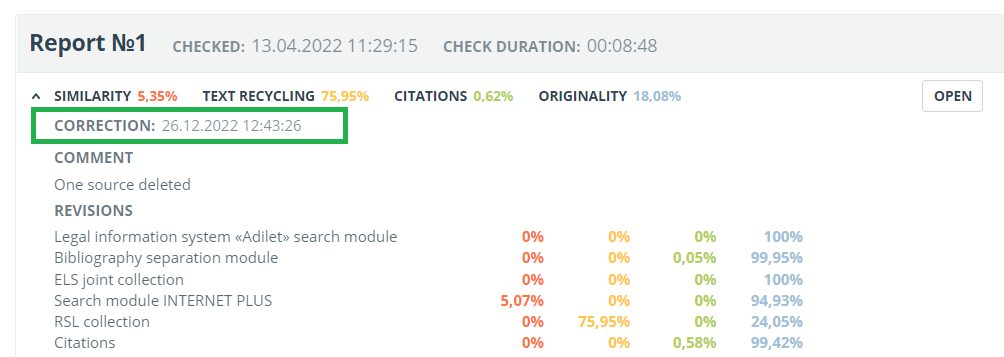
You can also view all the corrections to the report, go to a specific correction and change it. The correction is created automatically when you edit the report.
Editing of the text blocks
You may adjust the check result not only by excluding or changing the source's type, but also by deactivating text blocks. This feature allows to not use the selected blocks when calculating the percentages.
To disable the necessary text block in the report, left-click on it. The “Deactivate” button will appear. After this the block will change color to gray. The system will automatically recalculate the percentages, but without accounting disabled text block.

To take the disabled text block into account again, find the disabled text block and click on it. The “Enable” button will appear. After clicking on it, the result will be recalculated again.
You may find out if there are the disabled text blocks and enable all the text blocks at once in the check results panel. To enable all text blocks, click on the “Enable All” button and the system will automatically recalculate the check result.
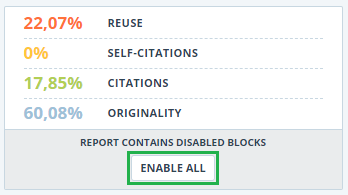
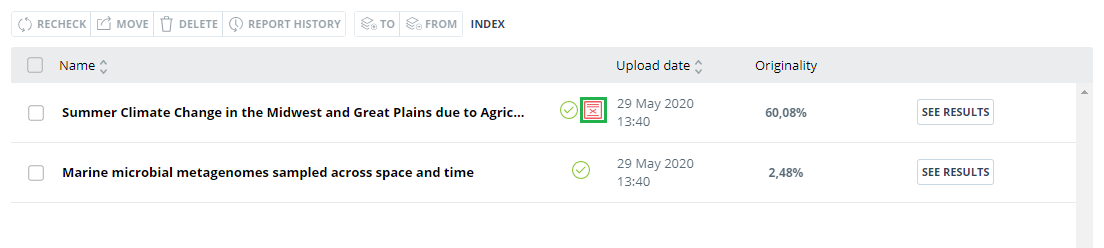
Also you may find out if there are any disabled text blocks in the workspace. In the list of documents a report that contains disabled text blocks has one more status : "The report contains disabled blocks".
Please note that text blocks of different sources may intersect with each other - one smaller block may be the part of the bigger block. After deactivating a large text block, the small text block will be deactivated with it.
You may use navigation on disabled blocks to the right of the report's text.
Comments to the report
On the full report page in the original view mode, you can make comments to the report. This functionality is not available in a text view mode. The comments button is located at the top panel of the page. The current number of comments to the report is shown in parentheses next to it. When you click on the button, a drop-down list of suggested actions opens. You can leave your comment and view all comments.

As you scroll down the document, the comments button moves to the right corner next to the page switching.

Adding a comment
When you click on "Create Comment", the mouse cursor changes to a special indicator of document areas where you can leave comments. In some areas of the document, the cursor may become translucent and colorless, which means you cannot leave comments on this area. A special mark is set at the place of the click, and a text box opens next to it. A comment length is limited to 250 characters.
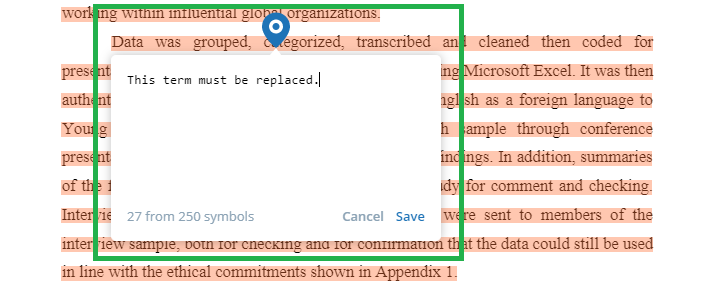
When you save a comment, a comment icon appears near the place where you made the mark.
![]()
If you change your mind about creating a comment, you can click anywhere outside the comment, or click the "Cancel" button in the text box, and it will disappear. After that, the cursor will become standard. To re-comment, click the comment button at the top panel of the page again and select "Create Comment."
Actions with comments
Each user with the rights to comment can do the following:
- Viewing;
- Editing;
- Deleting.
You can edit your comments. To do this, click the "Edit" button, make changes and click the "Save" button. If you want to delete your comment, click the "Delete" button and confirm the deletion.
View all comments
To view all comments at the report, click on the comments button at the top panel and select the "View all comments" option in the drop-down list. You will see a modal window with a list of comment links. A comment link displays a full text of the comment in the report. Viewed links are highlighted in grey.
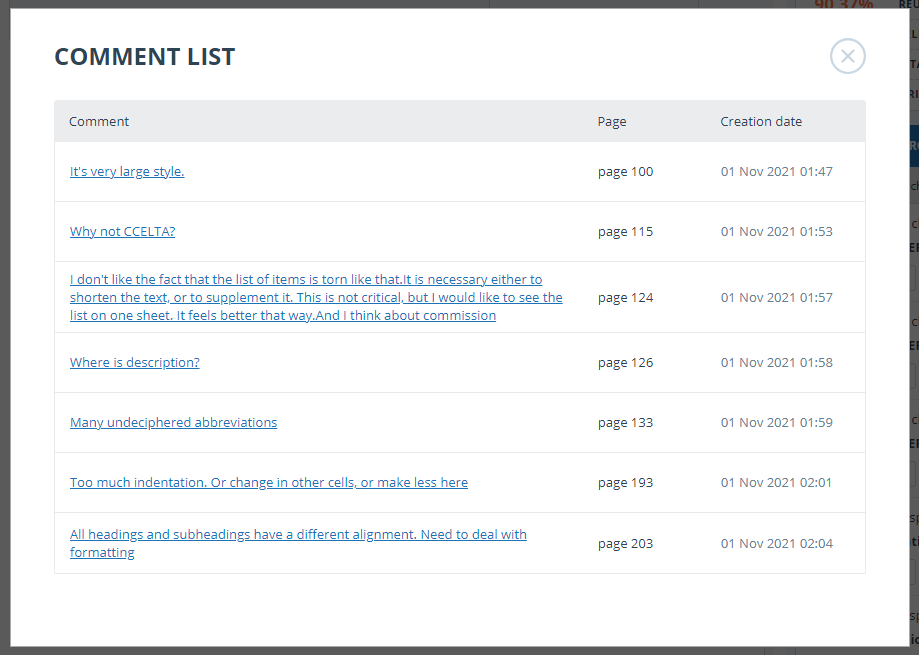
You can click on the comment text only. After the click, the modal window with the comments list will close, a page with the comment will display and a textbox with the comment will open on the page.
Access by a direct link
A direct link to a report displays all comments in a read-only mode. You cannot create and edit comments even if you are logged in to the system.
Editing of the sources' list
When viewing the full report, you can, if necessary, to perform the following actions with sources:
- Changing of source type;
- Source exclusion;
- Source recovery.
To manage sources, you can click on the icons in the block on the right side of the full report page.

Changing of source type
To change the type of source, you need to click on the "Pencil" icon.
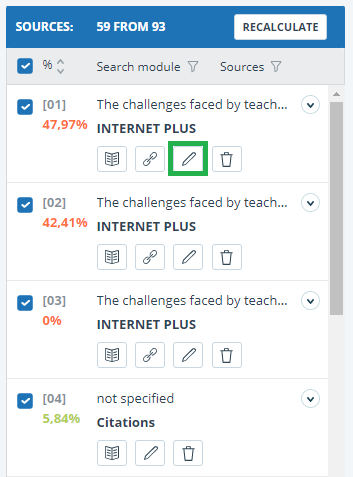
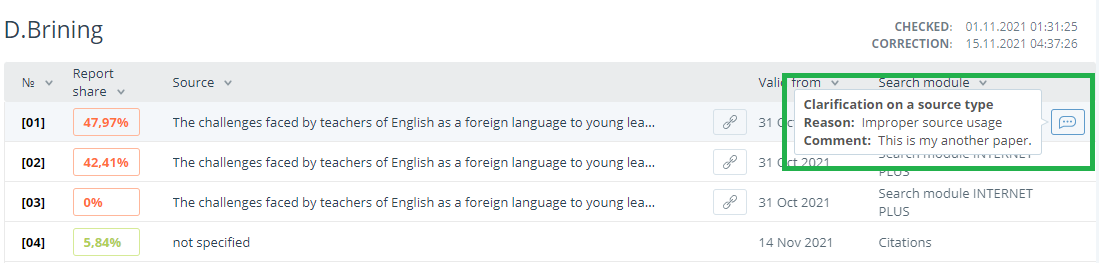
Clicking on the icon will open a modal window for detailed correction of the source type. In this block, it will be necessary to indicate the new type, the reason for changing the source and your comment on the changes.
The list of reasons depends on the selected source type. For each of the reasons, there is a tooltip that is visible when hovering over the question mark. If you did not find a suitable reason, you can select "Other", but with the obligatory indication of a comment.

The reason and comment will be displayed in reports and printed forms.
Source exclusion
To exclude a source, you need to click on the "Trash" icon.
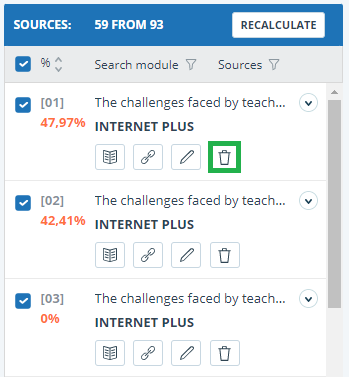
When you click on the icon, a modal window will open to confirm the action with an indication of the reason and a comment. It is obligatory to indicate the reason.

Source recovery
If you need to restore an excluded source, first, in the block on the right, you need to filter the sources by their status. To do this, in the filter panel, select "Sources" and select "excluded sources" from the list. The content of the block will be reloaded, instead of the exclude icon, the source restore icon will appear.

When you click on the restore source icon, a modal window for confirming the action will open.
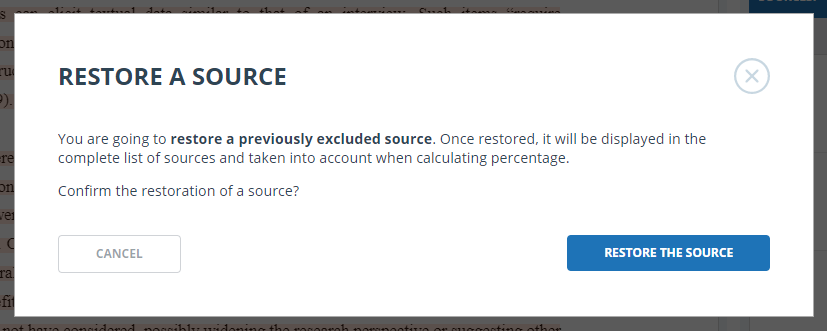
Upon confirmation of the action, the source will reappear in the list of active ones.
Editing text similar blocks
You may adjust the result of the check not only by removing the source, but also by disabling individual similar blocks in the text. This allows you to ignore the selected blocks when calculating the percentage of text similarity or quotation.
To disable the particular block in the report, click it with the left mouse button. The "Deactivate" button appears. After clicking the "Deactivate" button, the block will change its color to gray. The system will automatically recalculate the percentage of text similarity without taking into account the block you have turned off.

To restore the block in the report, find the disabled block and click on it. The "Enable" button appears. Click on it, and the result will be recounted.
You can see if there are any blocks off, and include all the blocks in the results panel at once. To enable the blocks, click the "Enable all" button, the system will automatically recalculate the result of the check.
If any report has disabled similar blocks, you can find out about them in your workspace. In the list of loaded documents, the report, which contains the disabled blocks, has another status "The report contains disabled blocks".
Please note that the blocks from different sources can overlap – one smaller block may be the part of the larger block. If you deactivate a larger block, the small block will be deactivated as well. Moreover, the shutdown of the small unit will occur on all sources to which it is included.
If the blocks intersect partially, only those fragments of the block that are not included in the intersection are disabled.
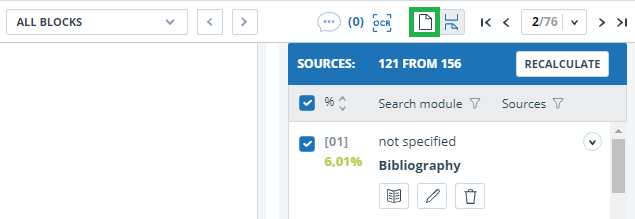
To save time when viewing disabled blocks in a report, use the navigation in the menu at the top of the report text. Click on the "All blocks" button. A navigation window will appear. Select "Disabled blocks". With it, you can go to the next or previous block by clicking on the left ("Previous") or right ("Next") buttons.

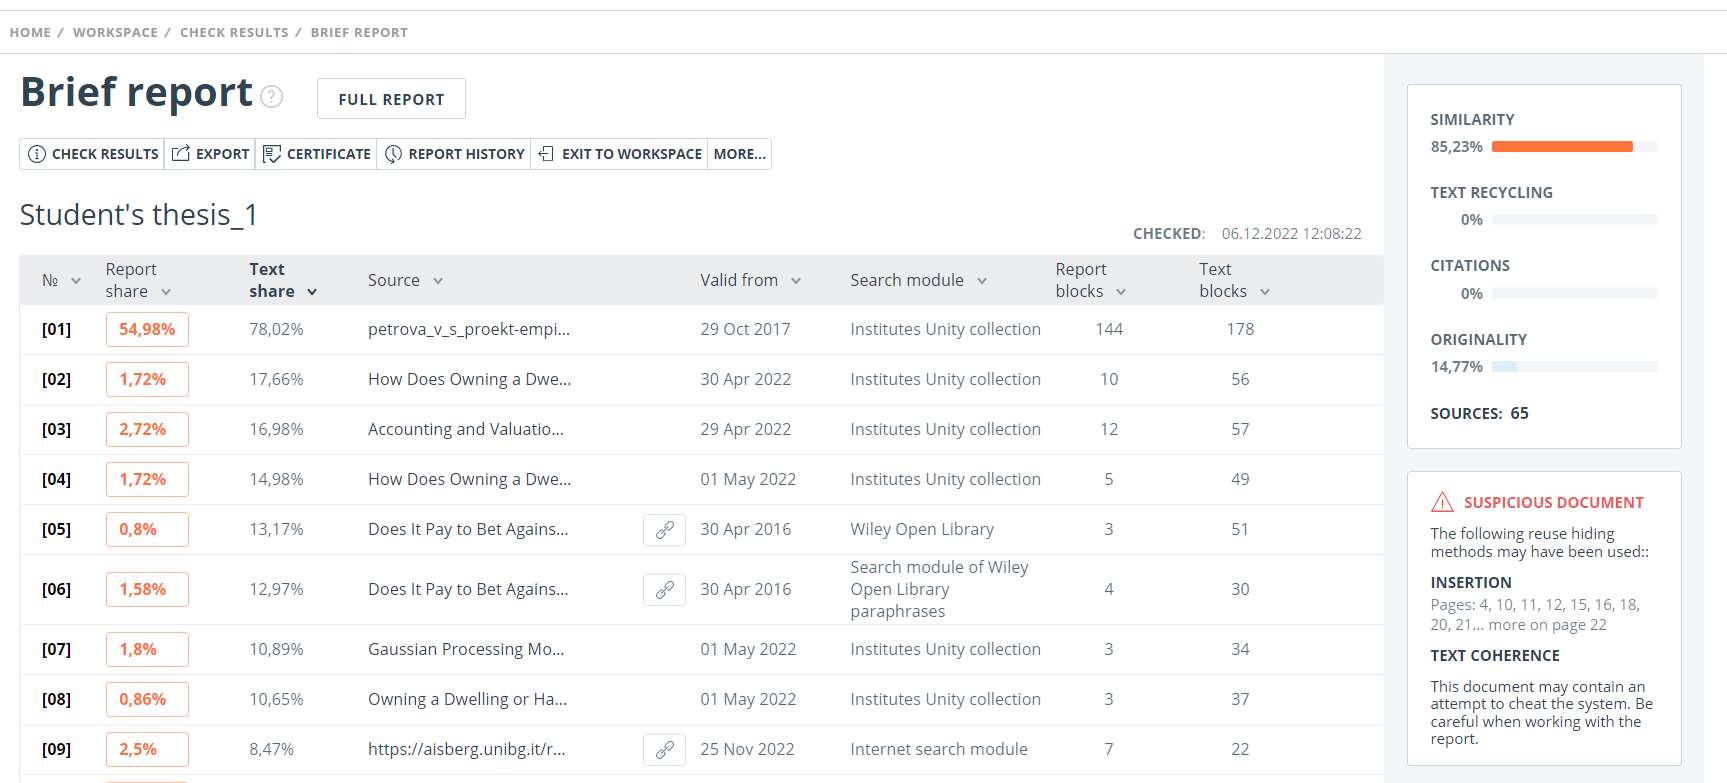
Brief report
To go to the brief report view page, click the “See results” button located on the line with the checked document. After this select "Brief report" button.
Brief report consists of distribution of percentages of originality, text similarity, quotes and text recycling as well as a list of similarity sources.
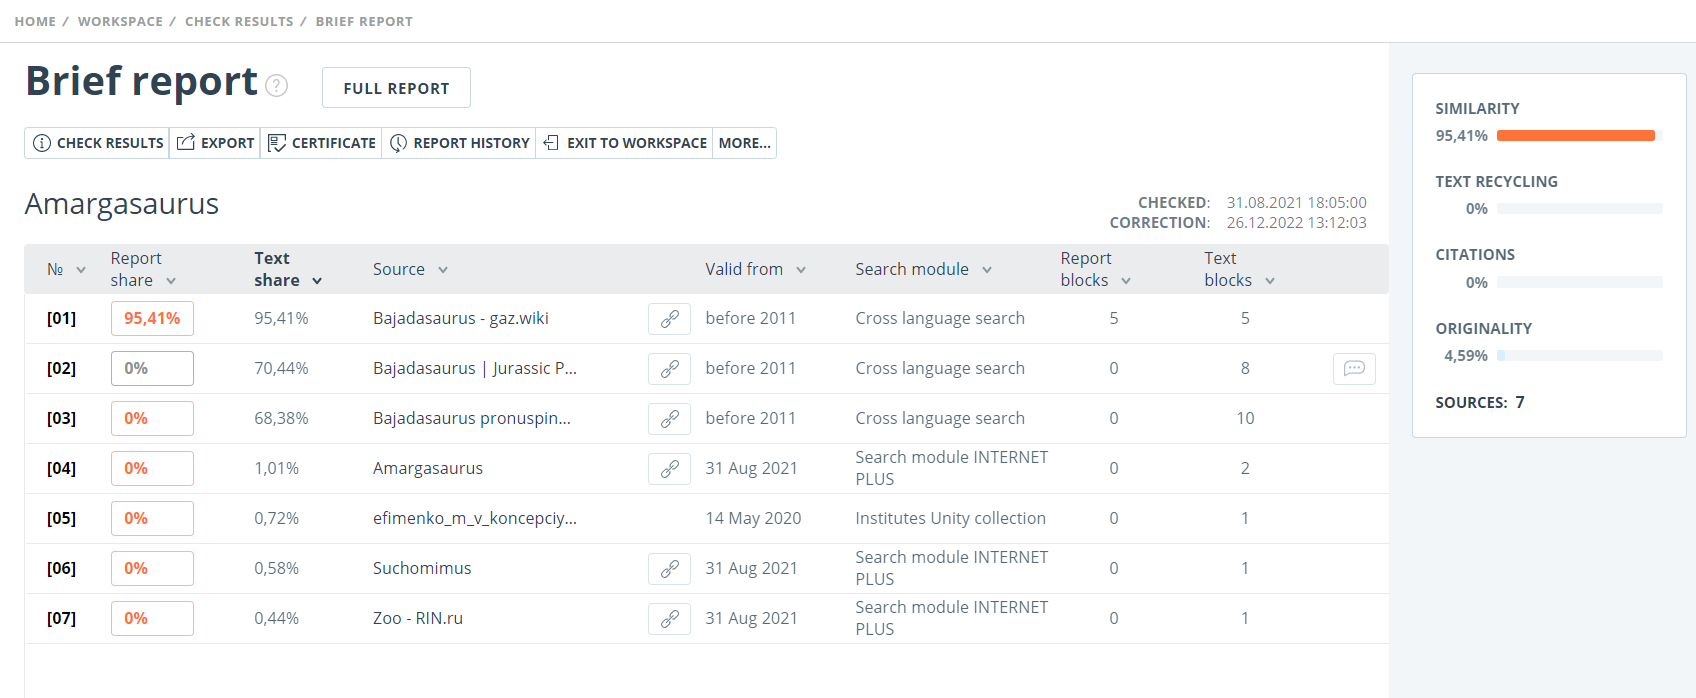
For most sources in the list there is an external link to the location of the document or source text on the Internet. To go to the web page, click the icon next to the source name.

In the top panel of the page you will see the icon buttons, allowing you to proceed to the following actions:
- parameters for checking;
- export of the report;
- downloading the Certificate;
- save the edited report;
- link to user manual;
- view reports history;
- report printing layout;
- view text metrics;
- get a direct link to the report.
To get more information about the results of the check, open the full report by clicking on the "Report" button.
Report with formatting
A formatted report allows you to view the results of the document check while maintaining the original formatting (indentation, fonts, titles) and displaying tables and figures.
To view the report with the formatting, switch the tab "Text view" to the tab "Original view".
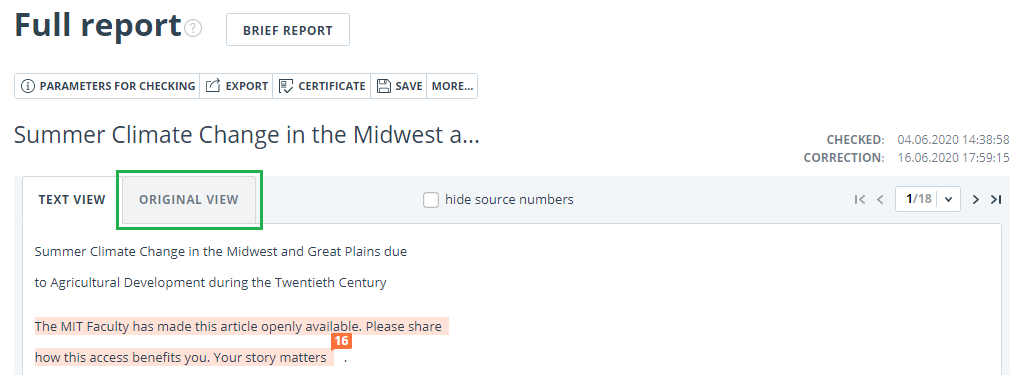
The Original view tab, as well as the Text view tab, displays reused parts and a list of sources, but the markup is applied to the original formatting of the document.
It is worth noting that when you export the pdf report, the text of the document is downloaded without any formatting.
You can view the document in its original form in the "Version for reading". To do this, click on the name of the document in your account. The text view of the document opens, then click the "Original view" tab.
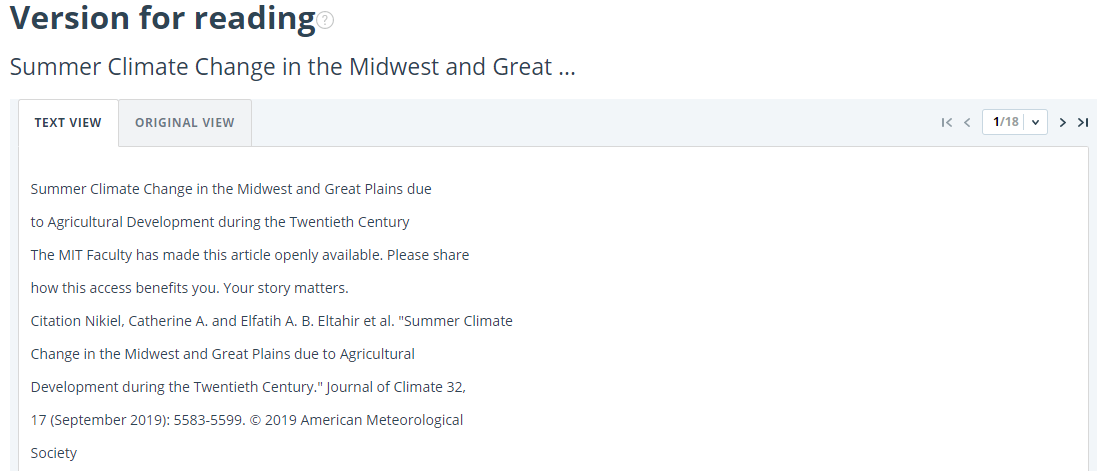
Please note that when adding for check files in txt, htm, html, pptx format, direct text input, you cannot view the original formatting of the document.
Document Structure
You can find sections of the checked document on the check results page in the "Document Structure" tab. The structure is extracted automatically while document is being checked for similarity.
Here you can see information about the following sections:
- Title page;
- Content;
- Main part;
- Bibliography;
- Appendix.

The following information is provided for each section:
- Whether it has been included in the check or not;
- The number of pages in the section;
- Page numbers for each section;
- Section’s text share compared to the text of the entire document
If a section has not been found by the system, a special notification will be displayed.
The block on the left shows a diagram of the document structure. Each section is marked in its own color. The sequence of the sections on the diagram reflects the sequence of the sections in the document.
When you click on the "Document Structure" button, a detailed analysis of the document divided by structure opens in a new tab.
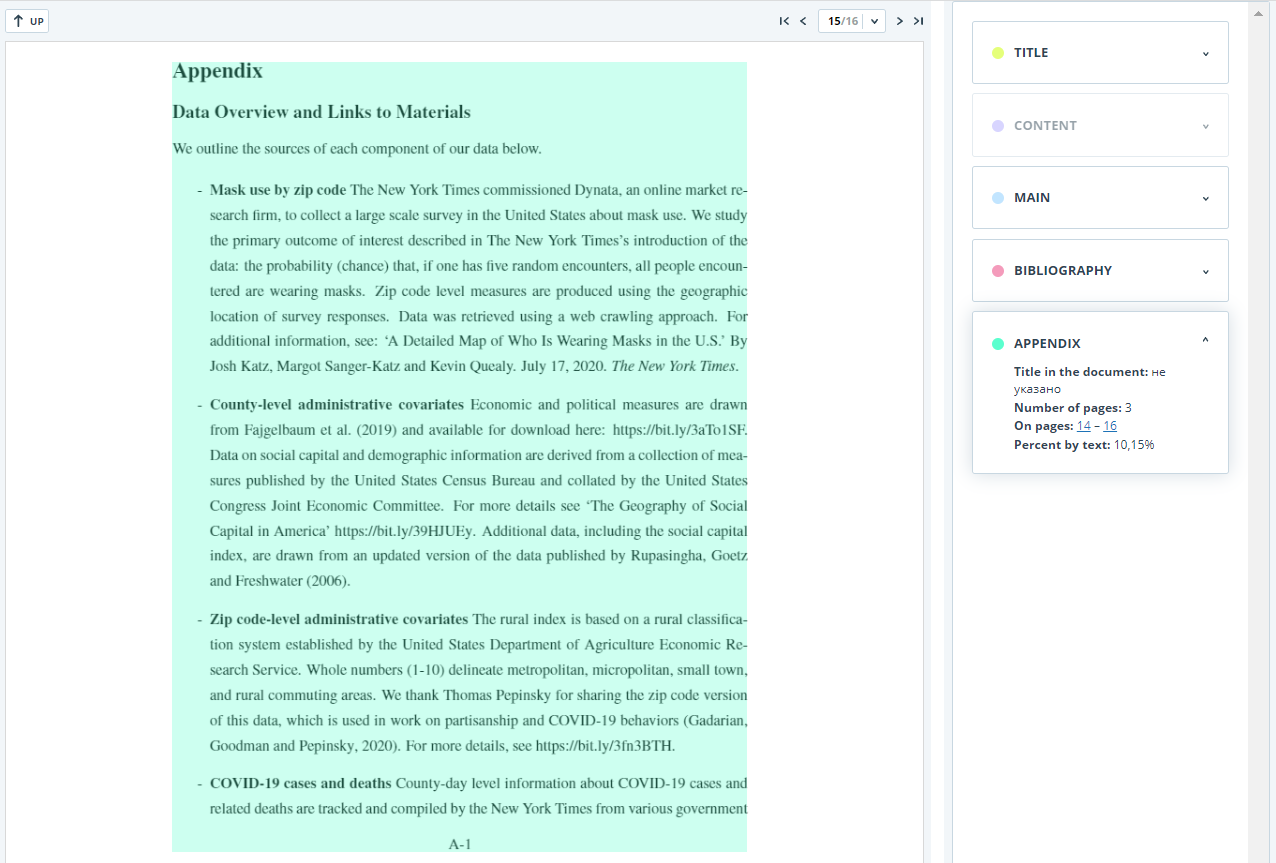
The panel on the right contains blocks with the sections. When you click on the block, you can see the information on the particular section. Clicking on the page number takes you to the respective page of the document. The text in the document is highlighted by the color of the corresponding section.
On this page you can edit the structure of the document recognized by the system if you see any errors. The following actions are available to you:
- adding a section;
- changing the borders of a section;
- deleting a section.
Adding a section
To add a new section that was not recognized by the system automatically, you need to open the menu for the desired section and click the "Add section" button.

After clicking this button, you will need to put markers for the beginning and end of the section being added. The start marker appears first. It should be placed on the first line of the section in any place. After setting the start marker, you need to put the end marker on the last line of the section in the same place. If everything is put down correctly, click "Apply" to complete the markup of the section.

Changing the section borders
You can edit the borders of an existing section. To do this, click on the "Change borders" button near the beginning or end of the section. Then you can left-click on the marker that you want to move. With the next mouse click, you can set the marker to a new position. When you are satisfied with the changed section borders, click "Apply" to complete the editing.

Deleting a section
You can also delete a section if it was identified incorrectly and needs to be removed. To do this, click the "Delete section" button at the beginning or end of the section. Please note that you cannot delete the "Main part" section, since it is mandatory.

Saving changes and refreshing check results
After making changes to the structure of the document, they need to be saved. To do this, click the "Save" button at the top of the screen.

Please pay your attention that after saving the changes in the structure, they are not automatically applied to the report. In order to see the results of checking the document with the updated structure, you need to recheck the document. For more information, see Document recheck
Suspicious document
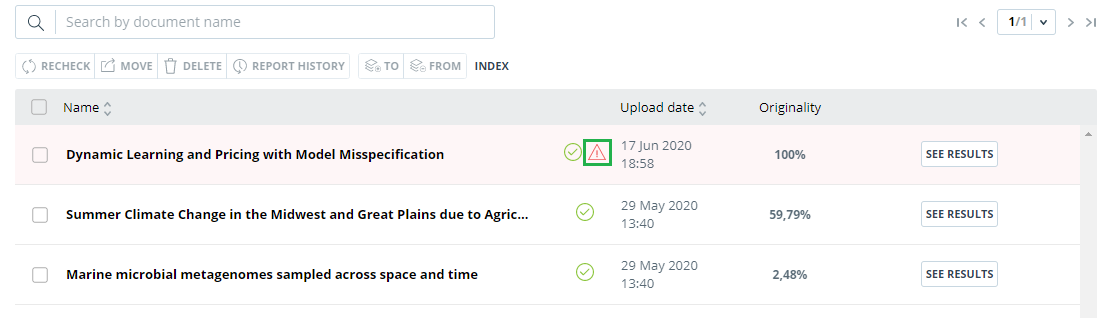
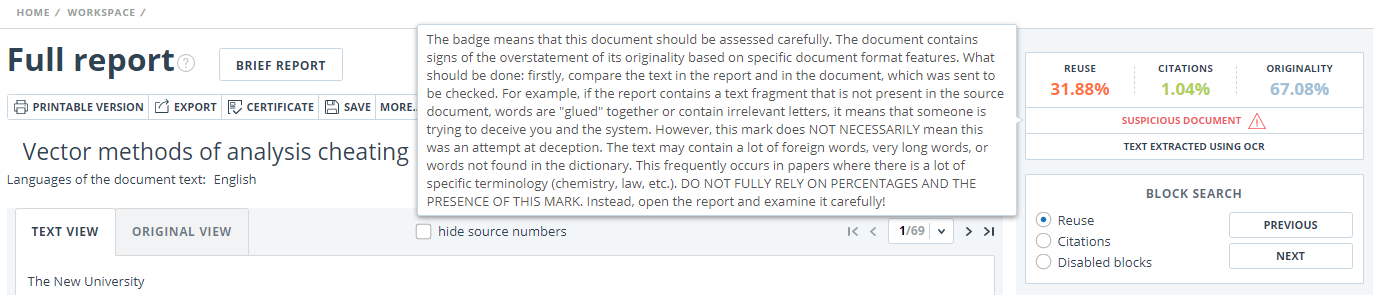
A suspicious document is a document that shows signs of technical ways to change the text or format, such as replacing characters, inserting invisible text, etc. Such signs may indicate that the author tried to cheat the system to hide text reuses and artificially increase the originality percentage. If such signs of cheating have been found in the document, a special flag will be put for it in the workspace and the list of documents of the company.
Please note that if you see a suspicious flag, we recommend that you carefully read the check report and the suspicious fragments found in the document. Detection of suspicious documents is an auxiliary tool for analysis. The final decision is always up to the verifier.
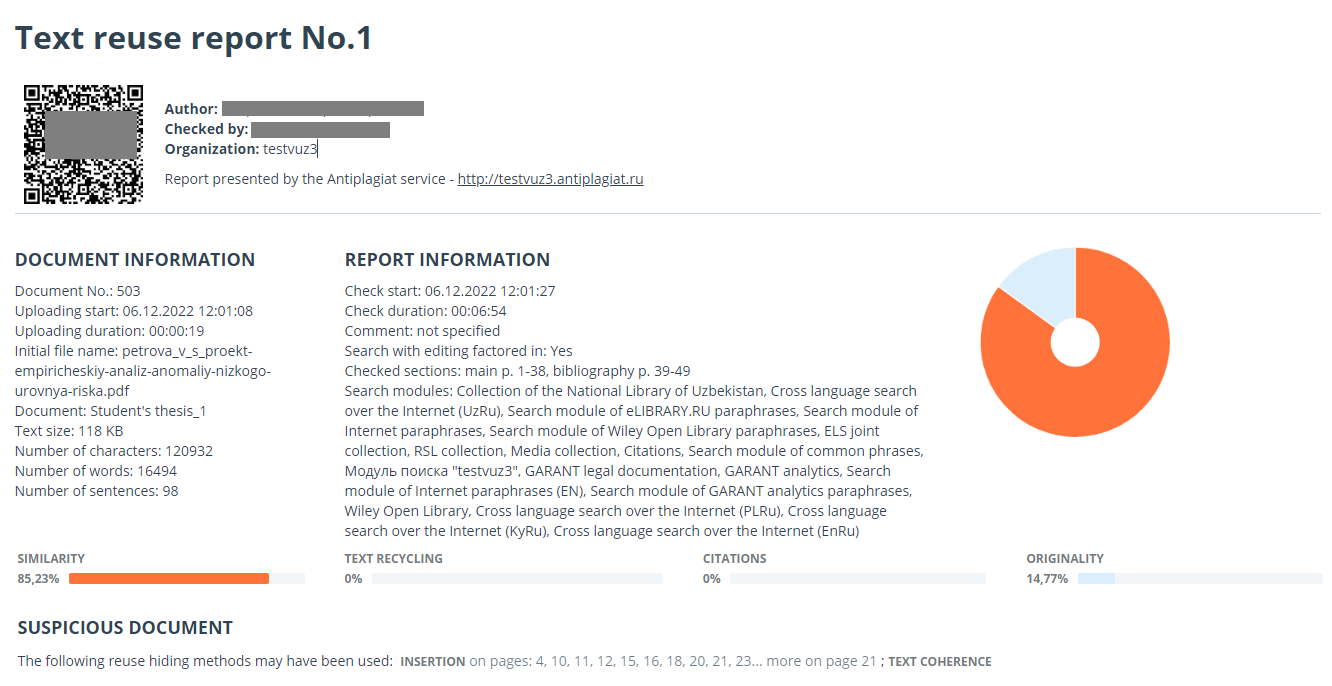
The information that the document shows signs of a cheating is displayed in the check reports, in the printable versions, and in the downloaded reports. In a brief report the page numbers with the detected potential cheating attempts are displayed.
The printable version of the check report provides information about potential cheating attempts. It shows the types of cheating and page numbers where suspicious fragments have been found. Similarly, information is displayed in the downloaded versions of reports.
A special block with a suspicious mark is displayed in the full report for a suspicious document. Click on the suspicious sign in the top menu. A window with the words "Suspicious document" and the "Details" button will appear. Click "Details" to go to the "Suspicious document" page and view detailed information about the suspicious text fragments. If the loaded document does not have formatting, instead of transferring to the "Suspicious document" page, the system will display page numbers with potential attempts to cheat the system.

Please note that if the uploaded document has no formatting, then instead of the link to "Suspicious document" there are the page numbers with potential cheating attempts displayed in the full report.
You may also access information about possible cheating on the “See Results” page. To do this, click on the "Details" link in the red suspicious document warning block.

The "Suspicious document" page displays detailed information about the suspicious fragments found in the document. You can read the text of the document in the form in which it was uploaded into the system (keeping the original formatting). If a fragment is found on the document page that may containg cheating attempt, it is marked in red.
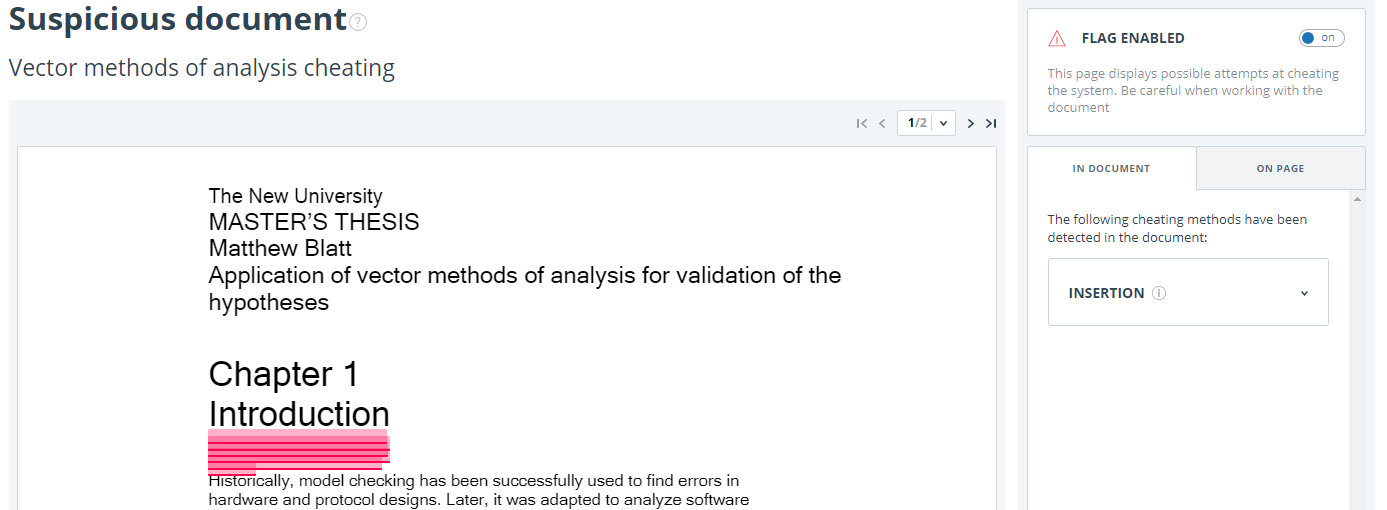
To view information about suspicious fragments for the entire document, click the "In document" tab in the right panel. To view the page numbers, click the name of the cheating method. To go to any of the listed pages, click on the desired number.

The "On page" tab provides information about suspicious fragments on the selected page of the document. To display certain cheating methods, check them and uncheck the others. The selected cheating methods are highlighted in red on the page, the removed cheating methods are underlined with a red line. To select all suspicious fragments on the document page at once, click on "Display all". In order to remove the selection from all the suspicious fragments, click on "Hide all".
It is also possible to review the text of the cheating, if it was extracted during the document processing.

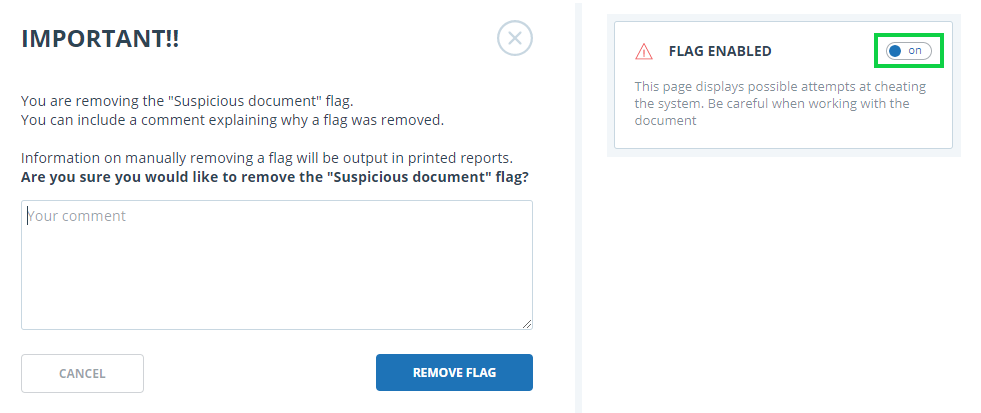
If the document does not contain cheating, you can disable the "Suspicious document" flag. To disable the flag, use the enable/disable button in the upper right corner of the "Suspicious document" page. You can leave a comment explaining why you disabled the "Suspicious document" flag. If you view the "Suspicious document" page through a direct link, you will not be able to disable the "Suspicious document" flag.
If you disable the "Suspicious document" flag:
- the respective icon will not be displayed in the Workspace;
- the brief report will not display information about the cheating;
- in the downloaded forms of reports and in a printable versions the information will appear in the "Suspicious document" section that the flag was disabled, and comments will be displayed;
- in the full report, you will see that the "Suspicious document" flag has been removed – the corresponding icon will become gray;
- you still have access to the "Suspicious document" page.

Potential cheating attempts view is different for documents that have been uploaded prior the availability of cheating detection function. For a brief report, the printable version and downloaded reports the text will be placed in "Suspicious document" blocks with a warning of the presence of suspicious fragments. For a full report, you will see the same text when you hover over the "Suspicious document" icon. The "Suspicious document" page is not available in this case.
Downloading the report
Downloading the report will allow you to save the report as a PDF file. To download the report to your computer, click on the "Export" button on the report viewing page.
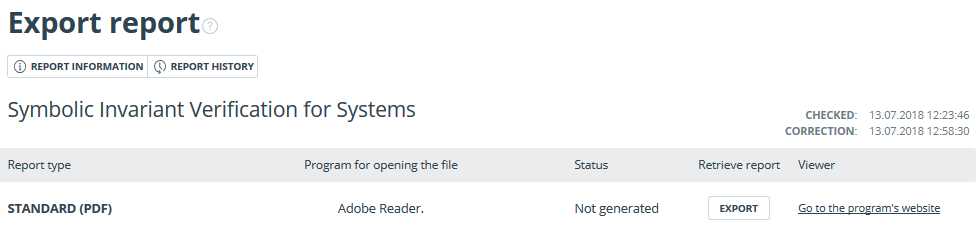
Page will appear "Export report". To start the report generation, click on the "Export" button. After some time, the button will change to "Download". Click on the "Download" button to download the file. The download will start automatically, or the file download and save dialogue window will open, depending on your browser settings.
In the downloaded report you will see information about the report and the loaded document, a terminological block with the description of the terms "Similarity", "Quotes", "Originality", "Text recycling", a list of sources and text with markup of quotation blocks (if the user unloads the full report).
Direct link to report from "See results" page
A direct link to the report allows you to give access to the report to any user, including users unauthorized in the system. This link allows you to view the report, however you cannot make changes to the report.
To get a direct link to a report, select the document in the workspace and click the “See results” button. After this click on "Create link" button and select "To full report" or "To brief report" in the drop-down list. A link to the selected type of report will be copied in the clipboard.

Also you may get a direct link to a report from "Full report" or "Brief report" pages. For example, to get a direct link to a full report, open the "Full report" page and click "More" in the top menu, then click the "Direct link to the report" button. A link to the full report will be copied in the clipboard.
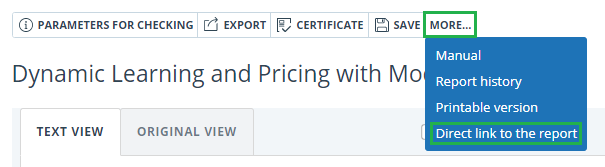
The mechanism for obtaining a direct link to a short report is the same as to a full report.
An external user who has followed a direct link will be able to view the report and text metrics (if this function is enabled), print the report to a page, and export the report (if this function is enabled). You cannot edit a report using a direct link.
The user can also share a link to a recheck report or a report with corrections. To do this, in the report history, open the version of the report or adjustment you are interested in. After that, perform the steps described above.
Certificate
Verification certificate is the filled form with the results of the check.
Please note that the functionality allows you to download only a filled form, which is not a legally significant document. You can certify it in your organization. Only your organization can give the legal effect to it.
To download certificate select the document in the workspace and click the “See results” button. After this click on "Download" button and select "Certificate" in the drop-down list.
![]()
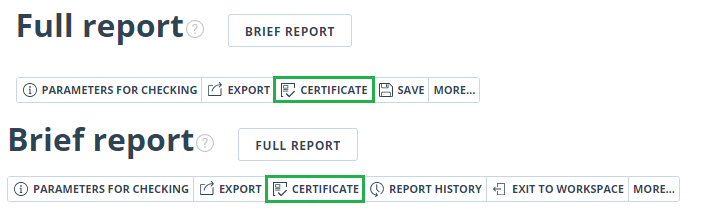
Also you may download certificate from "Full report" or "Brief report" pages. To do this, open the page with the report and click on the "Certificate" button in the top menu.
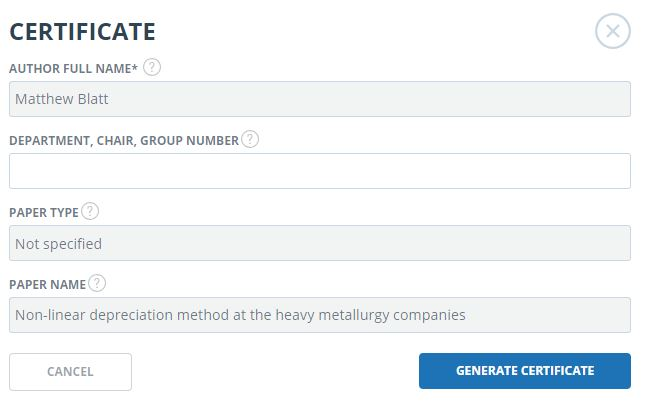
Window of downloading of certificate's form will open. Fill in the required field "Author full name". After filling of the fields, click on "Generate certificate" – this will start the loading of the form.
The user with the "Student" role also may download a certificate from the student's workspace. To do this, tick the selected paper and click on the "Certificate" button in the top panel. After that the dowloading of the certificate's form will start.

The created form displays information about the author and the paper, the percent of similarity, quotes, text recycling and originality, the date of evaluation, the list of search modules (for which the evaluation was made), the user, who evaluated the paper. The "Signature date" and "Signature of reviewer" fields are left empty to be filled in by hand.

Contact information
For technical support, please contact: support@antiplagiat.ru
If you have questions about purchasing the service for organizations, please contact our Sales department: sales@antiplagiat.ru
If you have questions about the methodology of the system implementation or user training, please contact: metodolog@antiplagiat.ru