Download the user manualGuide for using the Digital Library
Introduction
This manual is intended to familiarize you with the use of the organization’s Digital Library for the "Antiplagiat.Edu" system.
Terms and Definitions
|
Term |
Definition |
|---|---|
|
Digital Library |
Digital library system of the organization. |
|
Section |
The main page of your organization in the Digital Library |
|
Subsection |
A subpage of a section. Needed for structuring and organizing storage |
|
Element / document |
File, or several files forming one object with parameters |
|
Metadata |
Descriptive characteristics (title, description, etc.) |
|
Export |
Upload, download |
Description of the Digital Library
Digital Library is your organization's electronic library system integrated with “Antiplagiat.Edu”. Its use makes it possible to comply with the order of the Ministry of Education and Science of the Russian Federation No. 636 dated June 29, 2015, which obliges to keep the graduation papers. Digital Library stores documents uploaded into tasks in the "Antiplagiat.Edu" system. You can independently upload documents directly to the Digital Library. Essentially, Digital Library is an electronic archive of your organization's documents.
The Digital Library capabilities
The Digital Library allows you to upload and store your organization's documents. All documents are kept in special collections. You can edit existing collections and create new ones.
The collections are divided into sections and subsections. This allows you to organize them according to the structure of your organization. For example, each subsection is a department, and the collections that refer to it are the courses taught there.
Documents can be placed in the Digital Library in two ways - through the "Antiplagiat.Edu" system and by uploading the document directly. There are no restrictions on the volume of stored documents. When documents are uploaded to the Digital Library directly, they are not checked in the "Antiplagiat.Edu" system.
Important! Reuse checks are carried out only in the "Antiplagiat.Edu" system. Documents uploaded by the user directly to the Digital Library (not through "Antiplagiat.Edu") will not be checked for reuse.
Entering the Digital Library
All "Antiplagiat.Edu" roles have access to the Digital Library, except for students. At the same time, the User and the Teacher in the Digital Library have equal opportunities. The Administrator has more of them - he can issue access rights, edit sections, collections and document parameters.
In order to log in to the Digital Library, go to the "Antiplagiat.Edu" system. Select the menu item "Go to Digital Library ". A new tab will open with your organization's section page.
![]()
Documents in the Digital Library
The Digital Library stores a large number of documents that come here through the "Antiplagiat.Edu" system or are uploaded by users directly. A document is an object that can consist of several files. These documents can be viewed, distributed among collections (see paragraphs 3.2.1 and 3.2.6), their parameters edited, downloaded.
Each document has its own page in the system. To view it, click on the name of the document - the system will redirect you to its page.
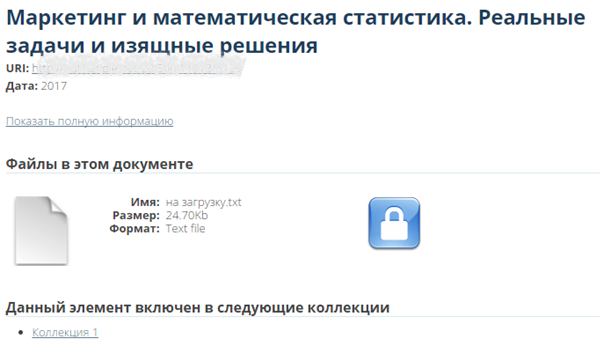
The document page displays a short description of the document, a link to full information about it, and the collections in which it is contained. The "Lock" symbol indicates the access restrictions to the document. There are no restrictions on access to the document for the administrator. To view the contents of the document, click on the page symbol.
If you follow the link for full information about the document, you will see the upload date, the name of the document in the system. You will also have a link to download it. You can return to viewing the short information: to do this, click on "Show short information".
Important! In both forms of viewing the document (full and short), the date is indicated. In short information, the date is the date of publication of the document. In full information, it is the date and time when the document was uploaded to the Digital Library.
Documents from "Antiplagiat.Edu"
Documents from "Antiplagiat.Edu" are loaded into the Digital Library in the following way: when the teacher creates a course and tasks, he can put a tick "Place in Digital Library" in the settings. In this case, the latest versions of the papers will be automatically loaded into the Digital Library when this task is sent to the archive (regardless of whether it has been assessed, whether there are comments on it, etc.).
Important! Only those documents that have been uploaded to the tasks get to the Digital Library from "Antiplagiat.Edu". Documents uploaded directly to the Digital Library (not through "Antiplagiat.Edu") are not checked for reuse.
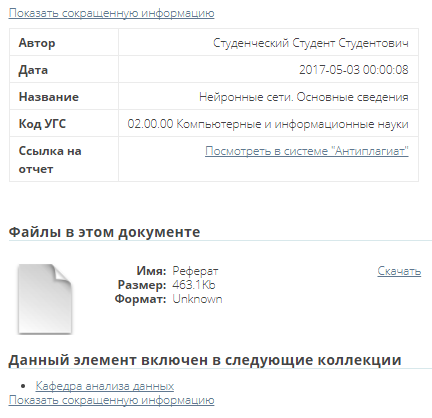
When a document enters the Digital Library through "Antiplagiat.Edu", it contains the following metadata: "Author" (the one who is listed in the "Antiplagiat.Edu" system as the author of the paper - a student), "EGS (enlarged groups of specialities) code" (from the task), "Link to the report"(direct link to the full report in the "Antiplagiat.Edu" system for this document).
Uploading documents to the Digital Library
Uploading documents is carried out through the collections of the Digital Library or through "Antipalgiat.Edu". For more details, see paragraphs 3.2.1 and 2.1. You can also get to the page for uploading the document through the page of dispatches (see paragraph 4.3.1).
Editing and deleting documents
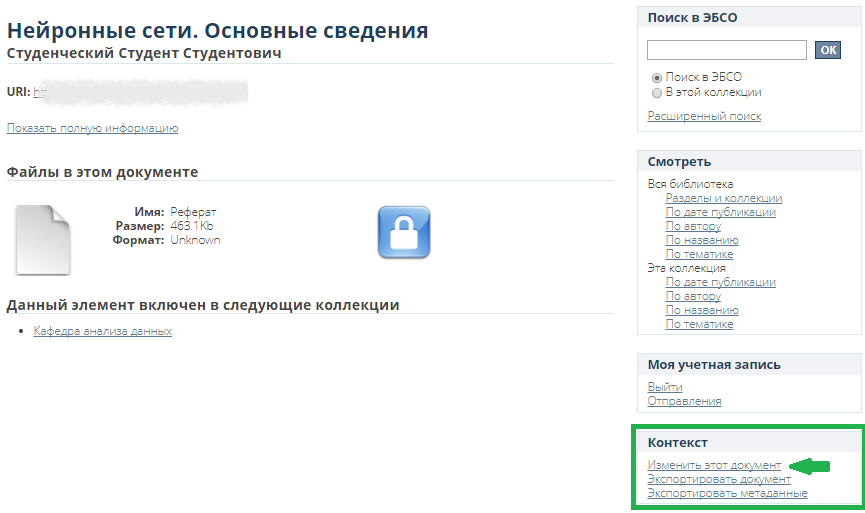
If necessary, the administrator can change a number of document parameters - its metadata, files attached to it, etc. In order to do this, you need to go to the document page. Then click on "Change this document" in the "Context" block on the right. The document editing page will open with several tabs.
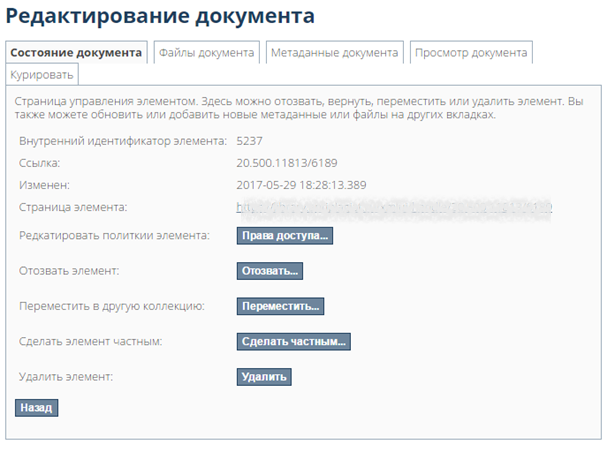
"Document status"
Change access rights: when editing a document, the administrator can change the access rights to it. To do this, click on "Access rights ...". You can open full access to this document for the entire Internet. In this case, the document will be available for indexing by search systems. It will also be available via a direct link.
Deletion: in order for the document to be completely deleted from the Digital Library, you need to click on "Delete". Moreover, if you open it using the link, the Digital Library will show an error message.
Important! If you delete a document from the system, it will be deleted from all collections (both from the initial one and from those to which it was copied).
Hide from the Digital Library search: so that the document could be found through the Digital Library search, you need to click on "Make item private". In this case, the document will disappear from all lists, and you can open it only if there is a link to it. But it will be displayed in the user’s dispatched items who uploaded it to the Digital Library.
Moving a document: in order to move it to another collection, you need to click on "Move" and select the collection.
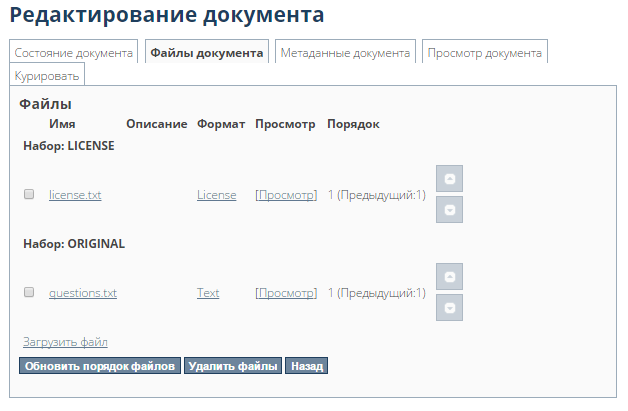
"Document files"
On the "Document files" tab, the administrator can edit the files attached to the document - delete some of them, add new ones, update the order.
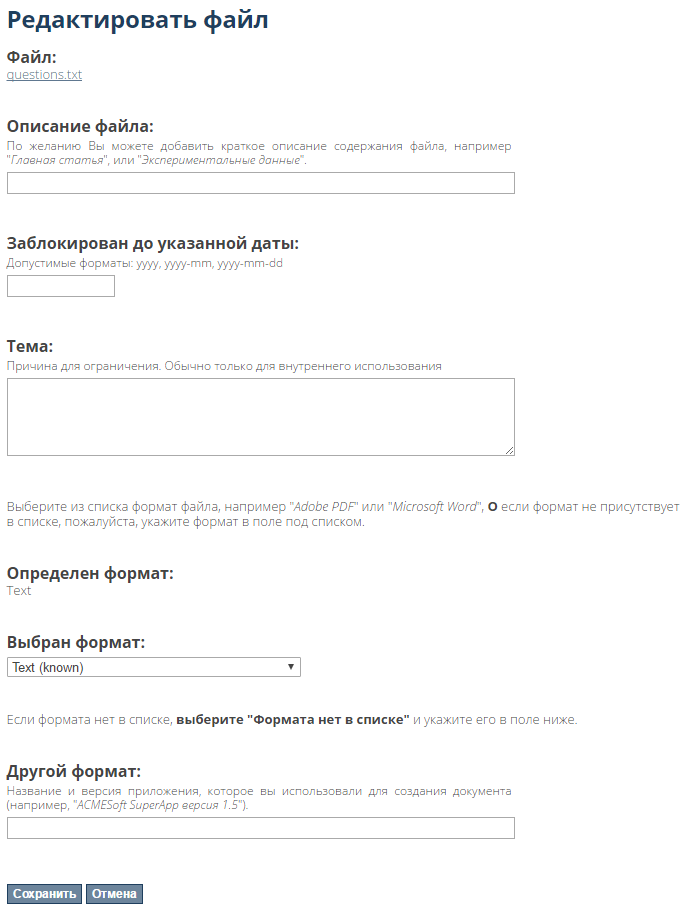
To add new files to the document, you need to click on "Upload file" - the page for adding a file will open. In order to specify the type of the uploaded file, you need to select the appropriate item from the drop-down list in the "Set" field. You can give a small description of the file, set a blocking date and specify a subject. When you click on "Upload", the file will be loaded into your document.
"Document metadata"
On the "Document metadata" tab, the administrator can edit existing document parameters or add new ones.
To add new metadata, you need to select the appropriate parameter from the drop-down list, fill in the value for this parameter and click on "Add new metadata". If you need to change the existing parameter, you can simply edit its value in the corresponding field and click "Change".

"View document"
The content of the "View document" tab duplicates the content of the document page. For documents from the "Antiplagiat.Edu" system, changes are also possible, but in "Antiplagiat.Edu" they are not shown in any way.
Exporting documents
The document has an export (download) function. In order to download a document, go to its page and click on "Export document" in the "Context" block on the right. The page for exporting documents will open with links to download, and you will receive a notification email.
If you follow the download link, the archive will be downloaded to your computer. There you will find document files, license text, several system files.
Digital Library structure: collections and sections
About section
Section - the main page of your organization in the Digital Library. Here you can post news, upload an image as a logo. When you enter the Digital Library through the "Antiplagiat.Edu" system, you will find yourself right here. Only one section is available for each organization, it can be changed, but you cannot delete it or add a new one.
It contains a collection that includes documents from "Antiplagiat.Edu". You can also create collections yourself, for more details on this in the section (see paragraph 3.2.4). When working with a section, you can view its documents by filters (see clause 3.1.1), search for documents (see clause 3.1.2), view the last added documents (see clause 3.1.3).
The administrator can structure a section by creating subsections and collections within them. He also has access to the ability to edit and export (download) a section (see paragraph 3.1.5).
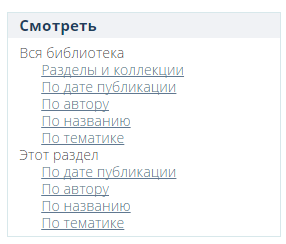
There are several blocks in the section:
- View - viewing the contents of the section with filters by publication date, author, title and subject;
- Search - search for documents by section;
- News - announcements posted by the system administrator;
- Subsections - displaying subsections of a section;
- Section Collections - a list of links to section collections;
- Latest additions - displays the documents last added to the section (from new to oldest).

To view all the collections and sections available to you, click on "Sections and Collections" in the "View" block on the right. The system will open a page that displays collections, sections, and subsections in a hierarchical list.
Viewing a section using filters
The "View" block allows you to view the documents uploaded to the system, filtering them by publication date, author, title or subject. The filter is configured by executing queries that are similar to search queries.
If a large number of documents were found according to your requests, the system will display them not all at once, but page by page. To go to the next page, click on "Next page". To go to the previous page, click on "Previous page". You can also adjust the number of documents displayed on the page - show by 5, 10, 20, 40, 60, 80 or 100.
Search by section
To find a document in a section or collection, use the section search. Enter your search query in the input field and click on "OK". The search results page opens, displaying the documents found. If the system did not find documents for your request, then you will see the inscription "Search did not give any results".
You can customize the display of sorting results. To do this, click on the icon highlighted in the picture below and select the desired sorting settings and the number of documents found on the page.

After the system has processed your search query and displayed the results, you can refine your query. To do this, click on "Add filter", and the filter setting will appear:
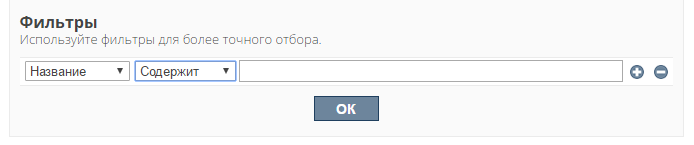
To set up a filter, follow these steps:
- Select what to filter - Title, Author, Subject, Release Date.
- Select by what condition to filter - "contains", "equal", "ID", "does not contain", "not equal", "not ID".
- Select a value for the filter condition.
To add several such filters, click on the cross. To remove a filter, click on the minus.
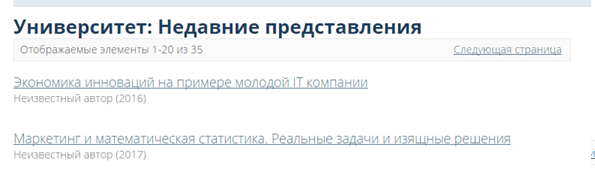
Last additions of documents to the section
On the page of the section, the last additions of documents to the Digital Library are displayed - the "Last additions" block. It displays documents added to the system manually or through "Antiplagiat.Edu" in order from the last loaded to the first loaded. The last few documents are displayed. If you want to see more documents, click on "View more" in the lower right corner of the page. This will take you to the recent views page.
Editing a section
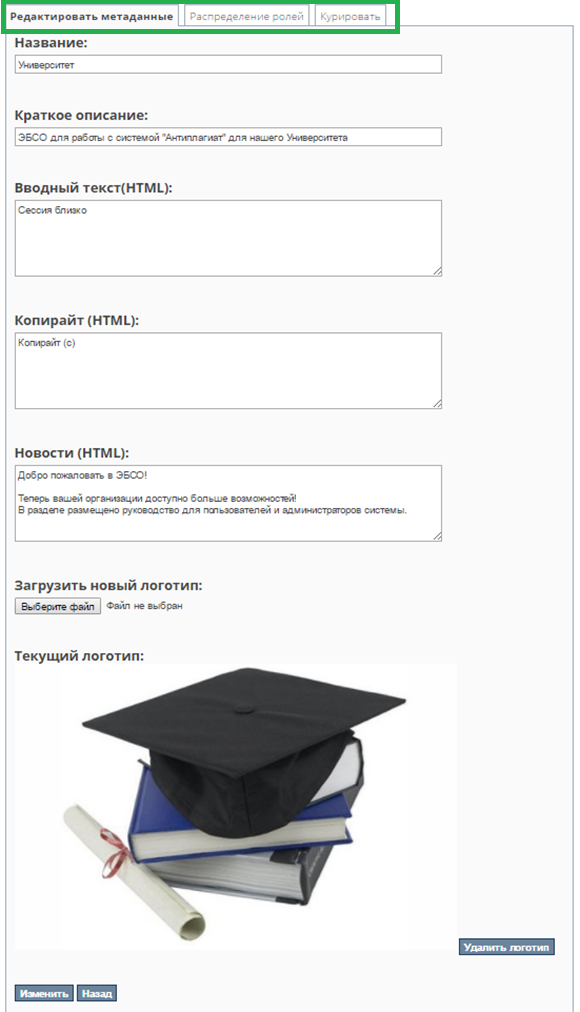
The Digital Library administrator can edit the section. To do this, open the section page and click on "Edit section" in the "Context" block on the right.
When editing a section, you can change its metadata ("Edit metadata" tab) - title, short description, introductory text, copyright, news, logo. All metadata is displayed on the section page.
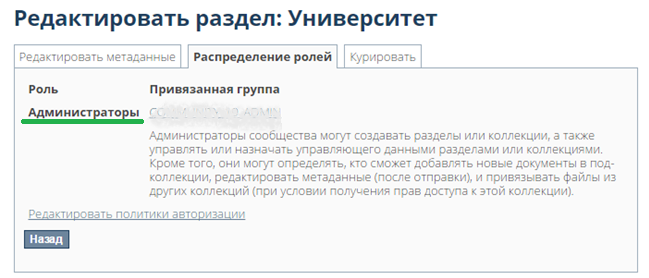
In editing the distribution of roles (the "Distribution of roles" tab), the administrator can go to the page for editing groups or edit access rights.
He can also change the group of section administrators. To do this, click on the link with the name of the group in the "Administrators" field.
The group editor page will open. Here you can add or remove users to the group. You can also use search to find other users or other groups and add them.
Initially, the Digital Library does not have users from "Antiplagiat.Edu". In order for them to appear in the lists of the Digital Library users, they need to go to this system at least once. Moreover, they appear there as soon as they first switched to this system from "Antiplagiat.Edu", and remain on these lists.
If a user has never logged into the Digital Library, he is not in the lists of the Digital Library users.

To change the access rights to the section, the administrator needs to click on "Edit authorization policies". The page for editing access rights to the section will open.
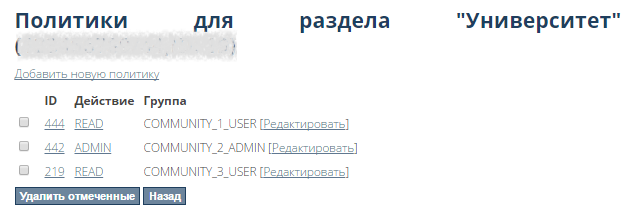
Here you can set new rights or delete existing ones. In order to set new access rights, you need to click on "Add new policy". The "Create new group policy" page opens.
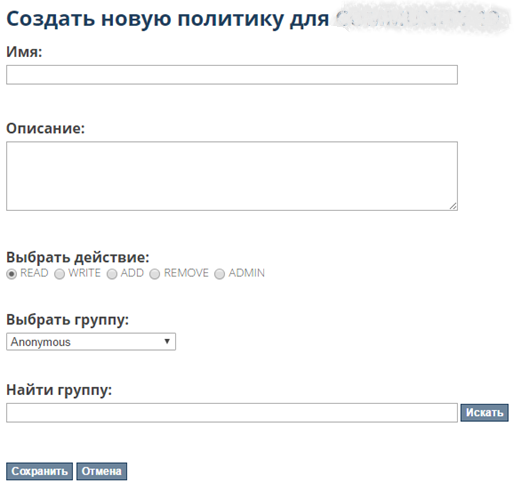
Here the administrator needs to enter the name of the new group of rights, give its description, select the actions allowed by the rights:
- read - reading;
- write - writing changes and reading;
- add - adding documents, writing changes, reading;
- remove - deleting, adding documents, writing changes, reading;
- admin - managing access rights, deleting, adding documents, writing changes, reading.
You need to indicate the group to which the rights will apply. It can be selected from the list or found through the search.
After finishing editing the fields, you need to click on "Save". To cancel the establishment of new rights - click on "Cancel".
Exporting a section
The Digital Library administrator has access to the function of exporting (downloading) the contents of the entire section. When downloading, an export file is generated, a link to which is displayed in the "My export" section (see paragraph 4.3.2).
To export a section, click on "Export section" in the "Context" block on the right. An export message page will open.
At the same time, an email will be sent to the administrator's e-mail with a link to download the export file, and "My export" link will appear in the "My account" block (if nothing has been downloaded before). The section export file contains folders by section collections. Each of them contains document folders containing configuration files and documents.
About subsections
To create a structure in a section and organize collections in the Digital Library, subsections are provided. Each subsection can have its own subsections. With their help, you can enter a hierarchical structure in your Digital Library - for example, faculty-department-specialty or faculty-department-group.
Subsections are primarily needed to group collections according to the structure you set up. If you logically correctly group the collections into subsections, taking into account the specifics of your organization's work, this will significantly speed up your work with the Digital Library.
The "Subsections" block on the section page of your organization contains a list of subsections. Click on the name of one of the subsections and the subsection page will open.
The subsection is structured similarly to the section, it contains the following blocks:
- View - view the documents of the subsection;
- Search by subsection - search for documents by subsection;
- Subsection collections - subsection collections, if any;
- Latest additions - the last additions to the subsection, if there are documents in the subsection collections;
- Subsections - a list of subsections, if any;
- News - news published in the subsection, if any.
Working with these blocks is similar to the work of the corresponding blocks of the section, only their effect extends to the subsection. For example, search - search by subsection, viewing with filters - only documents in a subsection, etc.
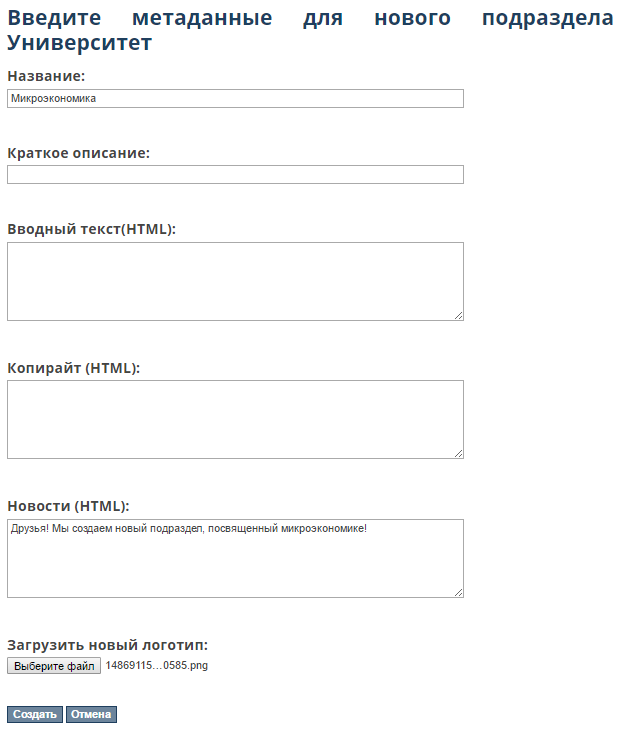
The Digital Library administrator can create and edit subsections. In order to create a subsection in a section, click on "Create subsection" in the "Context" block on the right on the section page. The system will open a page for filling in the subsection metadata - the same as for the section. You need to fill them in and click on "Create". The created subsection will appear in the section. Similarly, you can create a subsection in a subsection - go to the subsection page and click on "Create a subsection" in the "Context" block.
Editing a subsection and exporting (downloading) it is the same as for a section.
About a collection
The documents submitted to the Digital Library are kept in the collections. It is important to remember that documents are not uploaded to sections - neither through uploading directly, nor through "Antiplagiat.Edu" - they go to collections. Only collections are fixed to sections.
When you create collections, try to separate them according to your goals. For example, it is more convenient to work with two collections "FQP" and "Coursework" than with one, where these documents are mixed, especially if there are many of them. However, how to store documents across collections is up to the user.
In order to view all the collections of the library, click on "Sections and Collections" on the right in the "View" block. The "Library sections" page opens with a hierarchical list of the library sections, subsections, and collections. Each item in the list is an active link.
Collections of sections and subsections are shown on their pages as lists with active links. If, for example, there are no collections in a subsection, then there will be no such list on its page.
To work with a collection, click on the link with its name in the "Collections of this section" block. A collection page is similar to a section and subsection page.
There is one default collection in the Digital Library - your organization's collection. Its name coincides with the identifier of your organization in the "Antiplagiat.Edu" system. You can create the rest of the collections yourself.
Adding a document to the collection
Documents get into the Digital Library collections in two ways - automatically through the "Antiplagiat.Edu" system or by uploading a document directly.
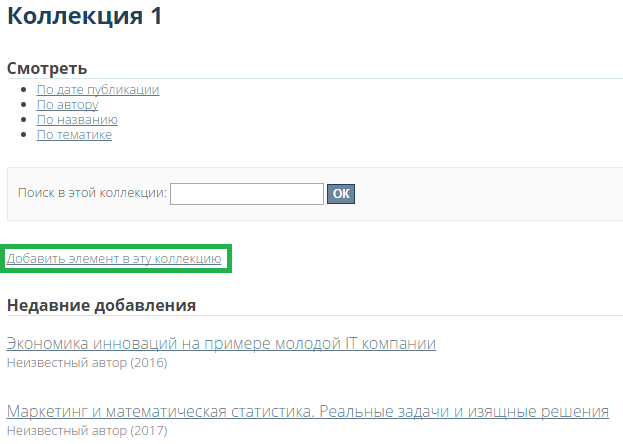
The administrator can add documents to the collection. To do this, he needs to go to the collection page and click on "Add item to collection". The system will open the page for adding a document.
Important! In the Digital Library, a document is a collection of several files combined into one object. For example, a document "Abstracts for a conference" may consist of a file with the text of the abstracts and several files with illustrations and diagrams for the report. A document and an element in the Digital Library are one and the same.
Adding a document to a collection consists of six steps. These steps are described later in the manual subsection.

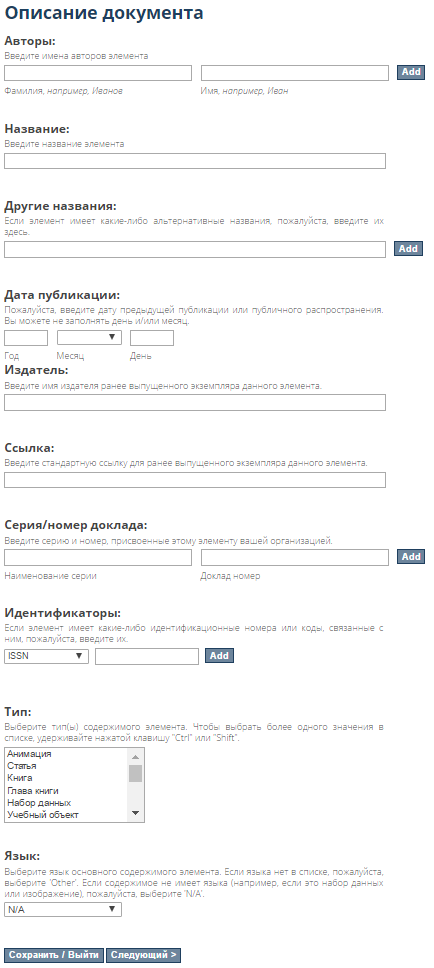
To add a document to the collection, you must fill in the document description, which is filling out the following fields by the administrator with information about the document:
- Surnames and names of the authors of the document: here you need to enter the surname and name of the author and click on "Add". If there are several authors, the action must be repeated for each author. If you need to remove any of the entered authors, then just select them with a "tick" and click on "Remove selected".
- Document name - required field;
- Other names - field for alternative names of documents. You need to enter an alternative name and click "Add". The system allows several alternative names. If you need to remove any of the entered names, then just select them with a "tick" and click on "Remove selected".
- Publication date is a required field. It takes only a year to fill in the field.
- Publisher - field for information about the publisher of the document.
- Link - a field for a link to a document.
- Series / Report number - if a report is loaded into the system, then you need to enter the series and numbers of the report assigned by your organization in these fields, and click "Add". The steps must be repeated for each series / number pair. If you need to remove any of the entered values, just select them with a "tick" and click on "Remove selected".
- Identifiers - field for identification numbers and codes. To fill in the field, you need to select the type of identifier (ISSN, “other”, ISMN, “state document #”, URI, ISBN) and enter its value, then click “Add”. Multiple identifiers can be entered. If you need to remove any of the entered values, just select them with a "tick" and click on "Remove selected".
- Type - a field for selecting the type of the document’s content. Here you need to indicate what is loaded from the Digital Library - a book, article, dissertation, etc. Several types can be selected by simply holding down the CTRL and Shift keys while selecting.
- Language - you can select the language of the main content for the document, or select "N / A" if it does not have a language (for example, when downloading images).
After filling out the information on this page, you can either go to the next stage of filling (click on "Next>"), or save the filled data and exit the document adding mode.
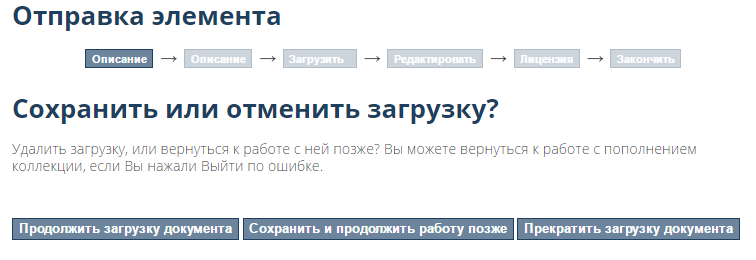
To exit the document adding mode, click on "Save / Exit". The system will offer three options for action:
- Continue working with adding a document (button "Continue loading document"). When you select this option, the page for filling out the document description will open.
- Save the information already filled in and exit the document adding mode ("Save and continue work later"). Selecting this option will open the “Submissions and Tasks” page. In the part "Incomplete submission" the added document will appear.
- Stop loading a document (button "Stop loading document"). If the administrator needs to stop loading the document without saving the filled data, just click the corresponding button. In this case, a message will appear about the deletion of the document and a link to the page with submissions.
In the second part of filling out the description of the document, the administrator indicates information about the subject, abstract information, information about sponsors, a verbal description of the document.
- Thematic keywords - fill in with keywords or phrases to define the topic of the document. Several topics can be added to the description. To add a topic, you need to enter its name and click on "Add". If you need to remove any of the entered names, just select them with a "tick" and click on "Remove selected".
The administrator can also select ready-made thematic categories - for this, click on the link "Thematic categories". A window will open with a list of categories and a filter by them. You can select keywords from the structure - in it they are grouped by thematic blocks. The system allows you to select topics in each block (click on the folder symbol) or the block itself (click on its name).
To search for the desired topic, you need to enter the name or part of it in the input field and click on "Filter".
Other fields to fill in:
- Essay - the field for the abstract of the document.
- Sponsors - field for sponsor names or funding codes.
- Description - for other descriptions and comments.
At the "Upload" stage, the administrator needs to upload a document (mandatory item) and give it a short description.
If you need to upload several files, then just click on the "Upload a document and add another one" button. In this case, the "My documents" block with the characteristics of the previously uploaded files will appear on the page.
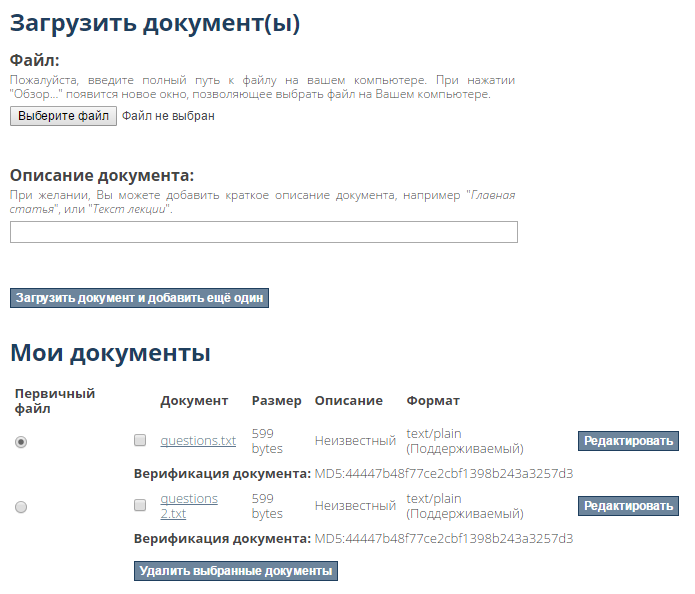
If the administrator uploads several files, then they can be edited separately. To do this, you need to click on "Edit" opposite the desired file. A page for editing it will open. Here you can give a description to the file, specify the date of blocking, subject. You can also change the file format - select one of the suggested ones, or enter a new one.
Upon completion of editing, you need to click on "Save".
At the "Edit" stage, you can check the correctness of all the previously entered data and edit them, if necessary. In order to change something, you need to click on "Edit one of the elements" in the required block. At the same time, the Digital Library will direct you to the stage at which you need to make changes. In this case, you do not have to re-fill all the previous and next steps.
In order to return to one of the previous stages, you need to click on its name in the editing chain. In this case, the filling of the remaining stages will remain.
At the "License" stage, you must provide a license to distribute the document. It is standard, it is enough to flag the "License grant" (required field). By checking the box, you give your consent to the placement of the document in the Digital Library.

After the document has been sent, the administrator will be shown a message about this and a link to the submit page. Here you can add another document - just click on "Add another document". This will open a page with a description of the document. For a new document, you need to go through the steps of uploading the document again.
Viewing a collection using filters
To view which documents are in the collection using filters, use the "View" block. It allows you to view documents uploaded to the system, filtering them by publication date, author, title or subject. Viewing is performed similarly to viewing a section using filters (see paragraph 3.1.1).
Search by collection
Similar to section search, the Digital Library implements collection search. In order to use it, enter your search query in the "Search in this section and its collections" field on the collection page. Search works in the same way as search by section or subsection (see paragraph 3.1.2).
Creating a new collection
The administrator can create his own collections. To do this, go to the page of the section or subsection in which you want to create a collection, and click on "Create a collection" in the "Context" block on the right. The page for editing the collection metadata will open: its name, short description, introductory text, copyright, news, license, source, logo. Any metadata filled in will appear on the collection page. After the fields have been filled in, you need to click on "Create". To cancel the creation of the collection - click on "Cancel".

After the metadata has been filled in, the role assignment page will open. Here the administrator can edit the access rights and security rights for the new collection.
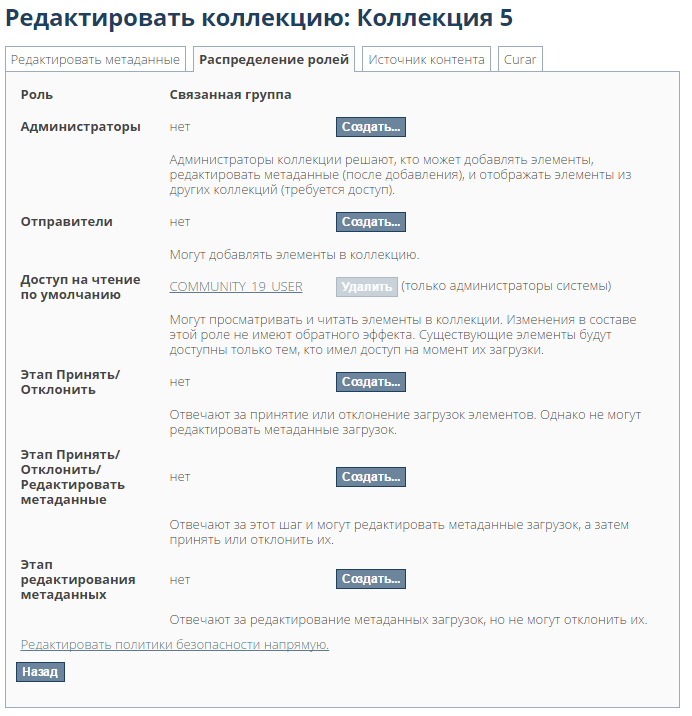
The administrator can create a new group for collection administrators, senders, those who can edit metadata, accept or reject documents uploaded to the system. Groups are created through the group editor, as in paragraph 3.1.4. Security rights are edited in the same way as for editing rights (see paragraph 3.1.4).
Editing a collection
The Digital Library provides the ability to edit the collection by the administrator. In order to make his own edits, he needs to go to the collection page and click on "Edit a collection" in the "Context" block on the right. Similarly to editing a section or subsection, you can make your own edits to the collection metadata, the distribution of roles (see paragraph 3.1.4). It is possible to correct content sources.
Copying a document from another collection
The administrator can copy documents from one collection to another. To do this, you need to open the collection page to which you want to copy the document, and click on the "Document catalog" in the "Context" block on the right. The system will open the page for displaying documents.
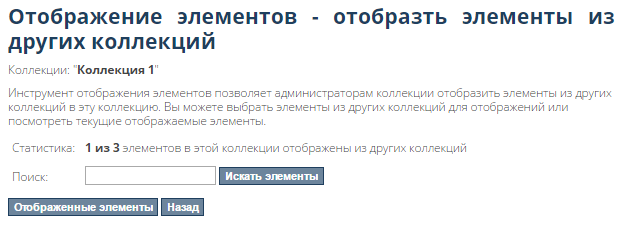
Next, you need to enter the name of the document you are looking for or the beginning of its name in the "Search" field and click "Search elements". A page with search results will open - you need to check the box for the required documents and click on "Show items".

If you want to see what documents have been copied to the collection, just click on "Displayed items". A list of displayed documents appears. If you need to remove the copied document from the collection, then select it with a "tick" and click on "Cancel display".
Exporting a collection
The administrator can download the contents of the collection to his computer. To do this, go to the collection page and click on "Export collection" - a page with an export message will open. Further - in the same way as for downloading a section (see paragraph 3.1.5).
Additional blocks for working with the Digital Library
The Digital Library interface has blocks on the right that provide quick access to the following functions:
- "Search in the Digital Library " - search for documents in a library, section, subsection, collection;
- "View" - viewing documents of a library, section, subsection, collection;
- "My account" - account management;
- "Context" - editing the content of a section, subsection, collection, document;
- “Browse by”- an overview of documents grouped by parameters.
"Search in the Digital Library"
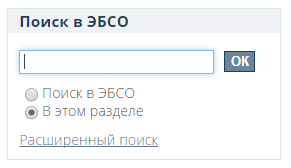
Enter your search query in the search box in Digital Library. In order to search the entire Digital Library, set the switch to "Search in the Digital Library ". If you want to search for a section or collection - switch to "In this section", "In this collection". Click on "OK". The system will display a page with search results similar to (see paragraph 3.1.2).
Through the search block, you can go directly to the advanced search page (see paragraph 3.1.2) - to do this, click on "Advanced search".
"View"
The "View" block duplicates the functionality of the "View" block from the pages of the collection, section, subsection (see paragraph 3.1.1). Its only difference is that you can view the content for the entire library, or only for the collection (or section, subsection) on the page you are located.
In it you can also see all sections and collections of the Digital Library - for this, click on "Sections and Collections" in the "All library" part of this block. The system in the form of a structure will show which sections and collections are in the Digital Library. From here you can quickly go to the pages of the sections of interest, subsections and collections.
"My account"
The block "My Account" contains links to uploads of documents in the Digital Library made by you, a link to the documents you downloaded (if you have exported anything). The credentials themselves (your e-mail) are displayed in the upper right corner of the page.
The block has a "Log out" button - if you want to log out, click on it.
View uploads in the Digital Library
To track the loading of documents into the system, click on "Submissions" - the page "Submissions and Tasks" will open. Here you will see the uploads of documents to the system made directly (not through “Antiplagiat.Edu”).
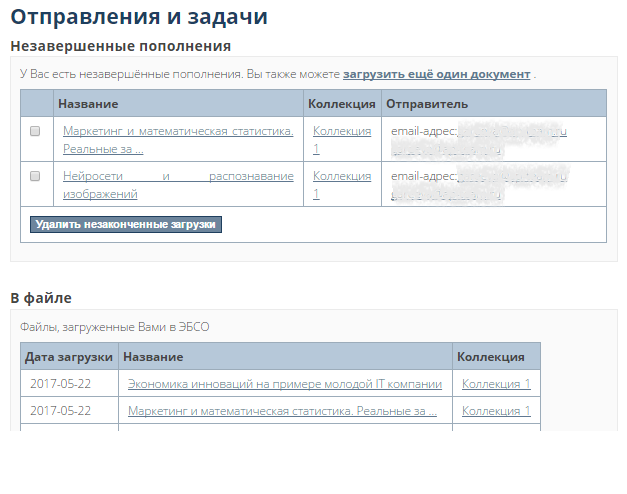
The page is divided into two sections - "Incomplete submissions" and "In file".
In the "In file" part, the documents that you have uploaded to the Digital Library are displayed.
In incomplete submissions, your interrupted uploads of documents in the Digital Library are displayed (see paragraph 3.2.1). Here you can delete unfinished uploads by flagging the necessary boxes and clicking on "Delete unfinished uploads".
From this page you can start uploading a new document. To do this, click on "Upload another document". The submit document page will open. Select the collection on it, which will contain the document.
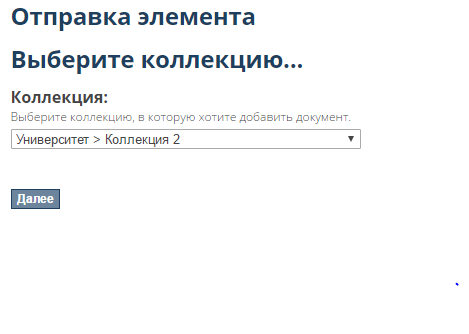
After selecting the desired collection, click on "Next" - you will find yourself on the page for adding a document. Further steps are described in paragraph 3.2.1.
The administrator can not only edit documents, but also export them.
View downloads
If you want to view which documents were sent for export (for downloading), then click on "My export" in the "My account" block. The export page will open - links to download documents are located here. Click on the link you need, and the download will start automatically.